Sign In
Upload
Manuals
Brands
Pioneer Manuals
Car Video System
Super Tuner IIID AVH-P4000DVD
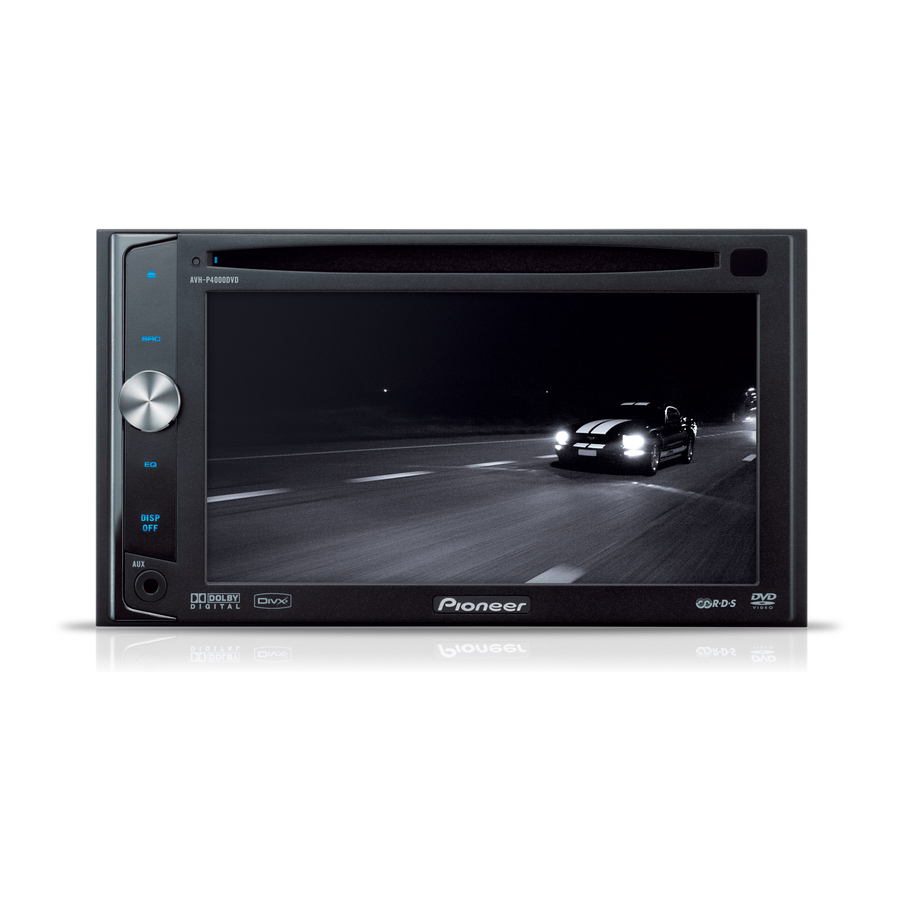
Pioneer Super Tuner IIID AVH-P4000DVD Manuals
Manuals and User Guides for Pioneer Super Tuner IIID AVH-P4000DVD. We have
5
Pioneer Super Tuner IIID AVH-P4000DVD manuals available for free PDF download: Service Manual, Operation Manual, Installation Manual
Pioneer Super Tuner IIID AVH-P4000DVD Operation Manual (99 pages)
DVD AV Receiver
Brand:
Pioneer
| Category:
Car Video System
| Size: 1.3 MB
Table of Contents
Table of Contents
2
Precautions IMPORTANT SAFEGUARDS
6
Precautions
6
Important Safeguards
6
To Ensure Safe Driving
6
Parking Brake Interlock
7
When Using a Display Connected to REAR MONITOR OUTPUT
7
When Using a Rear View Camera
7
To Avoid Battery Exhaustion
7
Before You Start
8
Information to User
8
For Canadian Model
8
About this Unit
8
DVD Video Disc Region Numbers
9
Playable Discs
9
About this Manual
9
After-Sales Service for Pioneer Products
9
Visit Our Website
10
Features
10
About WMA
11
About MP3
12
About AAC
12
About DIVX
12
About the SAT RADIO READY Mark
12
To Protect the LCD Screen
12
Indicators Meanings
13
When an Operation Is Prohibited
13
For Viewing LCD Comfortably
13
Changing the Wide Screen Size
13
Changing the Picture Adjustment
13
What the Marks on Dvds Indicate
13
Resetting the Microprocessor
13
Feature Demo Mode
14
Operating this Unit
15
What's What
15
Head Unit
15
Optional Remote Control
15
Basic Operations
16
Power ON/OFF
16
Selecting a Source
16
Adjusting the Volume
17
Touch Panel Key Basic Operation
17
Radio
18
Basic Operations
18
Storing and Recalling Broadcast Frequencies
18
Introduction of Advanced Operations
18
Storing the Strongest Broadcast Frequencies
19
Tuning in Strong Signals
19
Built-In DVD Player
19
Basic Operations
19
Basic Playback Controls
20
Switching the Media File Type
21
Operating the DVD Menu
21
PBC Playback
21
Playing DIVX VOD Content
22
Skipping Back or Forward to Another Title
22
CM Skip/CM Back
22
Resume Playback (Bookmark)
22
Searching for the Part You Want to Play
23
Changing Audio Language During Playback (Multi-Audio)
23
Changing the Subtitle Language During
23
Playback (Multi-Subtitle)
23
Changing the Viewing Angle During Playback (Multi-Angle)
24
Frame-By-Frame Playback
24
Slow Motion Playback
24
Return to the Specified Scene
24
Automatic Playback of Dvds
25
Text Information
25
Selecting Tracks from the Track List
25
Selecting Files from the File Name List
25
Introduction of Advanced Operations
26
Repeating Play
26
Playing Tracks in Random Order
26
Scanning Tracks or Folders
26
Selecting Audio Output
27
Using Compression
27
Playing Songs on Ipod
27
Basic Operations
27
Playing Video
28
Browsing for a Song/Video
28
Displaying Text Information on Ipod
28
Repeating Play
29
Playing Songs in a Random Order (Shuffle)
29
Playing All Songs in a Random Order (Shuffle All)
29
Operating this Unit's Ipod Function from Your Ipod
29
Pausing a Song
29
Selecting Songs from Album List of Currently Playing Artist
29
Changing Audiobook Speed
30
Playing Songs on USB Portable Audio Player/Usb Memory
30
Basic Operations
30
Pausing Compressed Audio Playback
31
Introduction of Advanced Operations
31
Displaying Text Information of an Audio File
31
Selecting Files from the File Name List
31
Audio Adjustments
32
Introduction of Audio Adjustments
32
Using Balance Adjustment
32
Using the Equalizer
32
Adjusting Loudness
33
Using Subwoofer Output
33
Boosting the Bass
34
Using the High Pass Filter
34
Adjusting Source Levels
34
Setting up the DVD Player
35
Introduction of DVD Setup Adjustments
35
Setting the Subtitle Language
35
Setting the Audio Language
35
Setting the Menu Language
36
Switching the Assist Subtitle on or off
36
Setting the Angle Icon Display
36
Setting the Aspect Ratio
36
Setting the Parental Lock
36
Setting the DIVX Subtitle File
37
Displaying Your DIVX VOD Registration Code
37
Setting for Digital Output
38
Initial Settings
38
Adjusting Initial Settings
38
Switching the Auxiliary Setting
38
Setting the Rear Output and Subwoofer Controller
39
Changing Languages for CAUTION
39
Switching the Sound Muting/ Attenuation
39
Entering PIN Code for Bluetooth Wireless Connection
40
Correcting Distorted Sound
40
Resetting the Audio Functions
40
Other Functions
41
Changing the Picture Adjustment
41
Changing the Wide Screen Mode
41
Introduction of System Adjustments
41
Selecting the Background Display
42
Setting the AV Input
42
Setting for Rear View Camera (Back up Camera)
43
Setting the Clock
43
Switching the Ipod Charge Setting
43
Adjusting the Response Positions of the Touch Panels (Touch Panel Calibration)
44
Selecting the Illumination Color
44
Selecting the OSD Color
44
Using the AUX Source
45
Using the External Unit
46
Using the PGM Button
46
Available Accessories XM Tuner
48
Basic Operations
48
Storing and Recalling Broadcast Stations
48
Selecting an XM Channel Directly
49
Switching the XM Channel Select Mode
49
Using the Mymix Function
49
Displaying the Radio ID
50
Switching the XM Display
51
Available Accessories
48
XM Tuner
48
SIRIUS Satellite Radio Tuner
51
Basic Operations
51
Storing and Recalling Broadcast Stations
52
Selecting the SIRIUS Channel Select Mode
52
Selecting a SIRIUS Channel Directly
53
Using the Mymix Function
53
Using the Game Alert Function
54
4 en
54
Displaying the Radio ID
55
Switching the SIRIUS Display
55
Using Instant Replay Function
55
Bluetooth Audio
56
Basic Operations
56
Pausing Playback
57
Introduction of Advanced Operations
57
Connecting a Bluetooth Audio Player
57
Disconnecting a Bluetooth Audio Player
57
Displaying BD (Bluetooth Device) Address
57
Bluetooth Telephone
58
Basic Operations
58
Setting up for Hands-Free Phoning
59
Making a Phone Call
59
Taking a Phone Call
59
Introduction of Advanced Operations
60
Connecting a Cellular Phone
60
Disconnecting a Cellular Phone
60
Registering a Connected Cellular Phone
61
Deleting a Registered Phone
61
Connecting to a Registered Cellular Phone
61
Using the Phone Book
61
Using the Call History
63
Using Preset Numbers
63
Making a Call by Entering Phone Number
64
Clearing Memory
64
Setting Automatic Answering
64
Setting Automatic Rejecting
64
Switching the Ring Tone
64
Echo Canceling and Noise Reduction
65
Displaying BD (Bluetooth Device) Address
65
Multi-CD Player
65
Basic Operations
65
Selecting a Disc
66
Pausing CD Playback
66
Introduction of Advanced Operations
66
Using CD TEXT Functions
66
DVD Player
67
Basic Operations
67
Selecting a Disc
67
Selecting a Folder
67
Pausing Disc Playback
67
Introduction of Advanced Operations
68
TV Tuner
69
Basic Operations
69
Storing and Recalling Broadcast Stations
69
Storing the Strongest Broadcast Stations Sequentially
69
Digital Signal Processor
70
Introduction of DSP Adjustments
70
Using the Sound Field Control
71
Using the Position Selector
71
Using Balance Adjustment
72
Adjusting Source Levels
72
Using the Dynamic Range Control
72
Using the Down-MIX Function
73
Using the Direct Control
73
Using the Dolby Pro Logic II
73
Setting the Speaker Setting
74
Adjusting the Speaker Output Levels
75
Selecting a Cross-Over Frequency
75
Adjusting the Speaker Output Levels Using a Test Tone
75
Using the Time Alignment
76
Using the Equalizer
77
Using the Auto-Equalizer
78
Auto TA and EQ (Auto-Time Alignment and Auto-Equalizing)
78
Additional Information Troubleshooting
81
Additional Information
81
Troubleshooting
81
Error Messages
83
Understanding Auto TA and EQ Error Messages
85
Handling Guideline of Discs and Player
86
DVD Discs
86
DVD-R/DVD-RW Discs
86
AVCHD Recorded Discs
86
CD-R/CD-RW Discs
86
Dual Discs
87
Compressed Audio Files on the Disc
87
Example of a Hierarchy
87
Compressed Audio Compatibility
88
USB Audio Player/Usb Memory Compatibility
88
Handling Guideline and Supplemental Information
88
Compressed Audio Compatibility
89
DIVX Video Files
90
DIVX Compatibility
90
About Handling the Ipod
90
About Ipod Settings
90
Using the Display Correctly
90
Handling the Display
91
Liquid Crystal Display (LCD) Screen
91
Keeping the Display in Good Condition
91
Small Fluorescent Tube
91
Language Code Chart for DVD
92
Terms
93
Specifications
96
Index
98
Advertisement
Pioneer Super Tuner IIID AVH-P4000DVD Service Manual (184 pages)
Brand:
Pioneer
| Category:
Car Receiver
| Size: 29.89 MB
Table of Contents
Caution
2
Safety Information
2
Warning
2
Additional Laser Caution
3
Laser Diode Characteristics
3
Adjustments
4
Cleaning
4
Lubricants, Glues, and Replacement Parts
4
Product Safety
4
Table of Contents
5
1 Service Precautions
6
Notes on Soldering
7
2 Specifications
8
Disc/Content Format
12
Panel Facilities
13
What's What
13
Head Unit
13
Optional Remote Control
13
Connection Diagram
14
3 Basic Items for Service
16
Check Points after Servicing
16
Pcb Locations
17
Jigs List
18
Grease List
18
Cleaning
18
4 Block Diagram
20
DVD Core Unit
26
Audio 2Ch Analog out
27
Compound Unit(A)
27
Monitor Pcb
28
5 Diagnosis
30
Operational Flowchart
30
Inspection Method of Pickup Unit
31
Execution Method
31
LD Current Check
32
ASMAX Check
33
Error Rate Check
33
Diagnosis Flowchart
34
BACK END Section Flow
34
Error Code List
56
USB Audio Player
57
UAB Memory
57
Connector Function Description
58
6 Service Mode
59
DVD Test Mode
59
Image of the Test Mode
59
Image of the Front End Test Mode
59
EDC. Image of the Test Mode
61
Calibration Test Mode
62
Monitor Test Mode
62
7 Disassembly
63
Removing the Monitor Assy
63
Removing the LCD Assy
63
Removing the Monitor PCB and Invertor PCB
63
Removing the DVD Mechanism Module
64
Removing the Interface PCB
64
Removing the Mother PCB
64
How to Hold the Mechanism Section
65
How to Remove the Module PCB
65
How to Remove the CRG Motor Assy
66
How to Remove the PU Unit
66
8 Each Setting and Adjustment
67
DVD Adjustment
67
Precautions
67
SKEW Adjustment
68
Replacement of PU Unit
69
Adjustment Procedure
69
Precautions in Handling the PU
73
Monitor Pcb Adjustment
74
Mother Pcb Adjustment
77
Invertor Pcb Adjustment
79
Invertor PCB(Side A)
79
Invertor PCB(Side B)
79
Touch Panel Adjustment
81
How to Activate the Calibration Test Mode
81
Menu Types in the Mode
81
Description of the Top Menu
81
Outermost Circumference Inspection
82
Display Specifications
82
Table of Setting Value Allowable Range
82
Key Operation Specifications
83
Calibration Verification
86
Data Initialization
88
Monitor Adjustment
89
Outline of Monitor Test Mode
89
Composition of Menu of Monitor Setting Value Adjustment Mode
89
Basic Explanation of each Menu
90
Line Adjustment 1 Menu
91
Line Adjustment 2 Menu
91
9 Exploded Views and Parts List
98
Packing
98
Packing Section Parts List
99
Exterior(1)
100
Exterior(2)
102
DVD Mechanism Module
104
10 Schematic Diagram
106
D 10. Schematic Diagram
106
Mother Pcb(Analog)(1/4)(Guide Page)
106
Mother Pcb(Power Supply)(2/4)
112
Mother Pcb(System)(3/4)(Guide Page)
114
Mother Pcb(Tuner)(4/4)
120
Interface Pcb
121
Keyboard Unit
122
DVD Core Unit(1/2)(Guide Page)
124
DVD Core Unit(2/2)
130
Compound Unit(A) and Compound Unit(B)
132
Monitor Pcb(Monitor)(1/2)(Guide Page)
134
MONITOR PCB(Osd,Ucom)(2/2)(GUIDE PAGE)
140
Invertor Pcb
146
Waveforms
148
11 Pcb Connection Diagram
150
Mother Pcb
150
Note for Pcb Diagrams
150
Interface Pcb
154
Keyboard Unit
155
DVD Core Unit
156
Compound Unit(A) and Compound Unit(B)
160
Monitor Pcb
162
Touch Panel
163
Invertor Pcb
166
12 Electrical Parts List
167
Miscellaneous
167
Ao y U163
167
Pioneer Super Tuner IIID AVH-P4000DVD Installation Manual (74 pages)
Brand:
Pioneer
| Category:
Car Video System
| Size: 5.46 MB
Table of Contents
English
2
Table of Contents
2
Connecting the Units
3
Parts Supplied
4
Connecting the System
5
Connecting the Power Cord
6
When Connecting to Separately Sold Power Amp
8
When Connecting with a Rear View Camera
9
When Connecting with a Multi-Channel Processor
10
When Connecting the External Video Component and the Display
11
When Using a Display Connected to Rear Video Output
11
Installation
12
Before Installing this Unit
12
Installation with the Holder and Side Bracket
12
Installation Using the Screw Holes on the Side of the Unit
13
Español
14
Conexión de las Unidades
16
Piezas Suministradas
16
Conexión del Sistema
17
Conexión del Cable de Alimentación
18
Cuando Conecte a un Amplificador de Potencia Vendido Separadamente
20
Cuando Conecte con una Cámara de Vista Trasera
21
Cuando Conecte con un Procesador Multicanal
22
Cuando Conecte el Componente Externo y la Pantalla
23
Cuando Utilice un Presentación Visual Conectado a la Salida de Vídeo Trasera
23
Instalación
24
Antes de Instalar Esta Unidad
24
Instalación con el Sujetador y Ménsula
24
Lateral
25
Instalación con Agujeros de Tornillo en el Lado de la Unidad
25
Deutsch
26
Anschließen der Einheiten
27
Lieferumfang
28
Anschließen des Systems
29
Anschluss des Betriebsstromkabels
30
Bei Anschluss an einen IM Handel Erhältlichen Leistungsverstärker
32
Bei Verbindung mit einer Rückwärtskamera
33
Bei Anschluss an einen Multikanalprozessor
34
Bei Anschluss von Externer Video-Komponente und Display
35
Bei Gebrauch eines am Hinteren Video-Ausgang Angeschlossenen Displays
35
Einbauverfahren
36
Vor der Installation dieses Geräts
36
Installation mit der Halterung und
36
Seitenhalterung
37
Installation mit Hilfe der Schraubenlöcher an den Seiten des Geräts
37
Français
38
Raccordements des Appareils
39
Pièces Fournies
40
Raccordement du Système
41
Branchement du Cordon D'alimentation
42
Raccordements À un Amplificateur de Puissance Vendu Séparément
44
Raccordements À Une Caméra de Recul
45
Lors du Raccordement D'un Processeur Multi-Canaux
46
Raccordements À un Appareil VIDéo Externe Et À un Écran
47
Lors de L'utilisation D'un Écran Raccordé À la Sortie VIDéo Arrière
47
Installation
48
Avant D'installer Cet Appareil
48
Installation en Utilisant Le Support
48
Installation À L'aide des Perçages Sur Le Côté de L'appareil
49
Italiano
50
Collegamento Delle Unità
51
Parti Fornite
52
Collegamento del Sistema
53
Collegamento del Cavo DI Alimentazione
54
Collegamento Ad un Amplificatore Venduto a Parte
56
Collegamento Alla Videocamera DI Retromarcia
57
Se CI si Collega Ad un Processore Multi-Canale
58
Collegamento DI un Componente Video Esterno E DI uno Schermo
59
Uso DI un Schermo Collegato All'uscita Video Posteriore
59
Installazione
60
Prima D'installare L'apparecchio
60
Installazione Nel Supporto con Le Staffe Laterali
60
Installazione Mediante I Fori Per Vite Laterali Dell'apparecchio
61
Dutch
62
Aansluiten Van de Apparatuur
63
Meegeleverde Onderdelen
64
Aansluiten Van Het Systeem
65
Aansluiten Van Het Stroomsnoer
66
Bij Aansluiting Op Een Los Verkrijgbare Eindversterker
68
Wanneer U Een Achteruitrijd-Camera Wilt Aansluiten
69
Wanneer Een Multikanaals Processor Wordt Aangesloten
70
Wanneer U Een Externe Videocomponent en Het Display Aansluit
71
Bij Gebruik Van Een Op de Achter-Video Uitgangsaansluitingen Aangesloten Display
71
Installeren
72
Voor U Dit Toestel Gaat Installeren
72
Installatie Met de Houder en de Zijbeugels
72
Installatie Met Behulp Van de Schroefgaten in de Zijkant Van Het Toestel
73
Advertisement
Pioneer Super Tuner IIID AVH-P4000DVD Installation Manual (8 pages)
Brand:
Pioneer
| Category:
Car Video System
| Size: 2.12 MB
Table of Contents
Connecting the Units
2
Connecting the System
2
When Connecting with a Multi-Channel Processor
3
Installation with the Holder and Side Bracket
4
Installation Using the Screw Holes on the Side of the Unit
4
Before Installing this Unit
4
Подключение Устройств
5
Pioneer Super Tuner IIID AVH-P4000DVD Installation Manual (6 pages)
Pioneer AVH-P4000DVD: Install Guide
Brand:
Pioneer
| Category:
Car Video System
| Size: 1.55 MB
Table of Contents
Connecting Units
1
Connecting Power Cord/Amp
2
Connecting System
2
Connecting the Units
2
Installation
3
Pièces Fournies
4
Raccordements des Appareils
5
Advertisement
Related Products
Pioneer AVH-P4900D
Pioneer Super Tuner IIID AVH-P4100DVD
Pioneer Super Tuner III D AVH-P4950DVD
Pioneer AVH-P4100
Pioneer AVH-P7600DVD
Pioneer Super Tuner IIID AVH-P5100DVD
Pioneer Super Tuner IIID AVH-P5200DVD
Pioneer Super Tuner IIID AVH-P6000DVD
Pioneer AVH-P5900D
Pioneer AVH-P7500DVDUC
Pioneer Categories
Car Receiver
Receiver
Stereo Receiver
Amplifier
CD Player
More Pioneer Manuals
Login
Sign In
OR
Sign in with Facebook
Sign in with Google
Upload manual
Upload from disk
Upload from URL