Sign In
Upload
Manuals
Brands
HP Manuals
Desktop
Z200 SFF
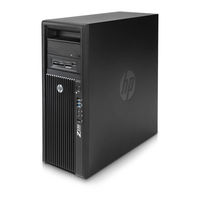
HP Z200 SFF Form Factor Workstation Manuals
Manuals and User Guides for HP Z200 SFF Form Factor Workstation. We have
3
HP Z200 SFF Form Factor Workstation manuals available for free PDF download: Maintenance And Service Manual, Installation Manual
HP Z200 SFF Maintenance And Service Manual (199 pages)
HP Z200 SFF Workstation Maintenance and Service Guide
Brand:
HP
| Category:
Desktop
| Size: 8 MB
Table of Contents
About this Guide
3
Table of Contents
5
1 Product Overview
13
Product Features
13
System Board Architecture
13
Graphics
14
Memory Technology
14
Processor Technology
14
Additional Features
15
Expansion Card Slots
15
Computer Components
16
Chassis Components
16
Front Panel Components
17
Rear Panel Components
18
Computer Specifications
19
Physical Characteristics
19
Power Supply Description
19
Power Supply Voltages
19
Power Supply Currents
20
Power Consumption and Heat Dissipation
21
Power Supply Specifications
21
Diagnostics and Troubleshooting on
22
Resetting the Power Supply
22
System Fans
22
Environmental Specifications
23
ENERGY STAR Qualification
24
ERP Compliance Mode
25
Disabling ERP Compliance Mode
25
Enabling ERP Compliance Mode
25
Accessibility
25
Hyper-Threading
25
SATA Power Management
25
Intel Turbo Boost Technology
26
HP Cool Tools
26
Ensuring Proper Ventilation
27
2 Setting up the Operating System
28
Setting up the Microsoft Operating System
29
Installing or Upgrading Device Drivers
29
Transferring Files and Settings to Your Windows Computer
29
Setting up Red hat Enterprise Linux
30
Installing with the HP Driver CD
30
Installing and Customizing Red Hat-Enabled Computers
31
Verifying Hardware Compatibility
31
Setting up Novell SLED
31
Updating the Computer
31
Updating the Computer after First Boot
31
Upgrading the BIOS
31
Determining Current BIOS
32
Upgrading BIOS
33
Upgrading Device Drivers
33
3 Restoring the Operating System
34
Restore Methods
34
Ordering Backup Software
35
Restoring Windows 7 or Windows Vista
35
Ordering the Restoreplus! Media
35
Restoring the Operating System
35
Restoring Windows XP Professional
36
Creating Restoreplus! Media
36
Creating HP Backup and Recovery (HPBR) Media
37
Restoring the Operating System
38
Using HPBR
38
Using Restoreplus
38
Using the Recovery Partition
38
Restoring Novell SLED
38
Creating Restore Media
38
4 System Management
40
Bios Rom
41
The Computer Setup (F10) Utility
41
Computer Setup (F10) Functionality
41
Accessing the Computer Setup (F10) Utility
43
The Computer Setup (F10) Utility Menu
44
Desktop Management
51
Initial Computer Configuration and Deployment
52
Installing a Remote System
52
Replicating the Setup
53
Copying a Setup Configuration to a Single Computer
53
Copying a Setup Configuration to Multiple Computers
54
Updating and Managing Software
55
HP Client Manager Software
55
Altiris Client Management Solutions
55
HP Softpaq Download Manager
56
System Software Manager
57
Proactive Change Notification
57
Subscriber's Choice
57
ROM Flash
58
Hpqflash
58
Remote ROM Flash
58
Failsafe Boot Block ROM
59
Recovering the Computer from Boot Block Recovery Mode
59
Workstation Security
60
Asset Tracking
60
SATA Hard Disk Drive Security
61
Drivelock Applications
62
Using Drivelock
62
Establishing a Setup Password Using Computer Setup (F10) Utility
64
Password Security
64
Entering a Power-On Password
65
Establishing a Power-On Password Using Computer Setup
65
Changing a Power-On or Setup Password
66
Entering a Setup Password
66
Deleting a Power-On or Setup Password
67
National Keyboard Delimiter Characters
67
Chassis Security
68
Clearing Passwords
68
Side Access Panel Sensor (Smart Cover Sensor) (Optional)
68
Side Access Panel Solenoid Lock
68
Cable Lock (Optional)
69
Fault Notification and Recovery
69
Drive Protection System
69
ECC Fault Prediction
69
Thermal Sensors
69
Dual-State Power Button
70
Changing the Power Button Configuration
70
5 Replacing Components
71
Warnings and Cautions
72
Service Considerations
73
Cautions, Warnings and Safety Precautions
73
ESD Information
73
Generating Static
73
Personal Grounding Methods and Equipment
74
Preventing ESD Equipment Damage
74
Grounding the Work Area
75
Recommended ESD Prevention Materials and Equipment
75
Tools and Software Requirements
76
Special Handling of Components
76
Cables and Connectors
76
Hard Drives
77
Lithium Coin Cell Battery
77
Customer Self-Repair
77
Removing and Installing Components
78
Component Locations
78
Predisassembly Procedures
80
Disassembly Order
81
Removing the Cable Lock (Optional)
81
Access Panel
83
Installing the Access Panel
83
Removing the Access Panel
83
Bezel
84
Installing the Front Bezel
84
Removing the Front Bezel
84
Front Bezel Security
85
Access Panel Sensor (Optional)
86
Removing the Access Panel Sensor
86
Installing the Access Panel Sensor
87
Access Panel Solenoid Lock
88
Installing the Access Panel Solenoid Lock
88
Removing the Access Panel Solenoid Lock
88
Removing and Installing Drives
88
Follow All General Predisassembly Procedures
89
Gather Required Tools
89
Perform a Data Backup
89
Predisassembly for Drives
89
Verify Drive Position and Information
89
Locate System Board Drive Connections
90
Remove Bezel Blanks
90
Locate Extra Guide Screws
91
Carefully Handle Hard Disk Drives
92
Removing an Optical Drive
92
Installing an Optical Drive
94
Removing a Hard Disk or Media Card from the Drive Cage
97
Installing a Hard Drive or Media Card Reader into the Drive Cage
99
Removing and Replacing the Primary Hard Drive
100
Cable Management
105
Power Connections
106
Using the Small Form Factor Computer in a Tower Orientation
107
Front Panel I/O Device Assembly
108
Removing the Front Panel I/O Device Assembly
108
Installing the Front Panel I/O Device Assembly
110
Installing the Speaker
112
Removing the Speaker
112
Speaker
112
Power Supply
113
Removing the Power Supply
113
Installing the Power Supply
114
Removing the System Fan Assembly
115
System Fan Assembly
115
Installing the System Fan Assembly
116
DIMM Installation Guidelines
117
DIMM Installation Order
117
Memory
117
Supported DIMM Configurations
117
BIOS Errors and Warnings
118
Removing a DIMM
119
Installing a DIMM
120
Card Configuration Restrictions for Power Supplies
122
Expansion Card Slot Identification
122
Slot Identification and Description
122
Choosing an Expansion Card Slot
123
Expansion Card Slot Description
124
Removing an Expansion Card
124
Removing and Installing Expansion Cards
124
Installing an Expansion Card
126
Battery
129
Removing the Battery
129
CPU Heatsink
130
Installing the Battery
130
Removing the CPU Heatsink
130
Installing the CPU Heatsink
131
Cpu
133
Removing a CPU
133
Installing a CPU
134
Installing the System Board
135
Removing the System Board
135
System Board
135
Product Recycling
136
6 Diagnostics and Troubleshooting
137
Calling Technical Support
138
Locating ID Labels
138
Locating Warranty Information
139
Diagnosis Guidelines
140
Diagnosis at Startup
140
Diagnosis During Operation
141
Troubleshooting Checklist
142
HP Troubleshooting Resources and Tools
143
HP Support Assistant
143
HP Help and Support Center
143
E-Support
143
Customer Advisories, Customer and Security Bulletins, and Customer Notices
144
Instant Support and Active Chat
144
Product Change Notifications
144
Troubleshooting a Problem
144
Helpful Hints
144
At Startup
145
During Operation
145
Customizing the Monitor Display
146
Troubleshooting Scenarios and Solutions
146
Solving Minor Problems
146
Solving Diskette Problems
148
Solving Hard Drive Problems
149
Solving Display Problems
150
Solving Audio Problems
152
Solving Printer Problems
153
Self-Troubleshooting with HP Vision Diagnostics
153
Overview
154
Downloading and Accessing HP Vision Diagnostics
156
Accessing HP Vision Diagnostics on the Computer
157
Creating and Using a Bootable DVD
157
Creating and Using a Bootable USB Key
157
Using the HP Memory Test Utility
157
User Interface
158
Survey Tab
158
Test Tab
160
Errors Tab
162
History Tab
162
Status Tab
162
Help Tab
163
Saving and Printing Information in HP Vision Diagnostics
164
Diagnostic Codes and Errors
164
Diagnostic LED and Audible (Beep) Codes
164
LED Color Definitions
166
POST Error Messages
168
7 Configuring RAID Devices
174
Maximum Hard Drive Configurations
174
Configuring SATA RAID Devices
175
Attaching SATA Hdds
175
Configuring System BIOS
176
Creating RAID Volumes
177
8 Configuring Password Security and Resetting CMOS
178
Preparing to Configure Passwords
178
Resetting the Password Jumper
179
Clearing and Resetting the CMOS
179
Using the CMOS Button
179
Using the Computer Setup (F10) Utility to Reset CMOS
180
170 Appendix A Connector Pins
182
Appendix A Connector Pins
188
Appendix B System Board Designators
188
Appendix C Routine Care
190
General Cleaning Safety Precautions
190
Cleaning the Computer Case
190
Cleaning the Keyboard
190
Cleaning the Monitor
191
Cleaning the Mouse
191
Appendix D Locating HP Resources
192
Product Information
193
Product Support
194
Product Documentation
195
Product Diagnostics
196
Product Updates
197
Index
198
Advertisement
HP Z200 SFF Installation Manual (22 pages)
HP Workstations - CRU Dataport DX115 kit installation
Brand:
HP
| Category:
Desktop
| Size: 1.13 MB
Table of Contents
Table of Contents
3
CRU Dataport DX115 Kit Installation
5
Introduction
5
Kit Contents
5
Before You Begin
5
Warnings and Cautions
6
Step 1-Preparing for Component Installation
7
Accessing the Internal Components of the Computer
7
Step 2-Installing the DX115 Case into the Optical Drive Bay
7
HP Z200 SFF and HP Z210 SFF Computers
8
HP Z200, HP Z210 CMT, HP Z400, and HP Xw4000 Computers
13
HP Xw6200, HP Xw6400, and HP Xw6600 Computers
15
HP Z600 and HP Z800 Computers
16
HP Xw8000 and HP Xw9000 Computers
18
Step 3-Installing a Hard Disk in the DX115 Carrier
18
Step 4-Completing the Computer Assembly
21
Japanese 日本語
22
HP Z200 SFF Installation Manual (8 pages)
HP SATA/SAS Hard Drive and Solid State Drive Installation
Brand:
HP
| Category:
Desktop
| Size: 0.72 MB
Table of Contents
Drive Installation
1
Kit Contents
1
Tools Required
1
Warnings and Cautions
2
Step 1-Preparing for Component Installation
3
Accessing the Internal Components of the Computer
3
Step 4-Reassembling the Computer
8
Step 5-Configuring the Computer
8
Regulatory Notices
8
Technical Support
8
Japanese 日本語
8
Advertisement
Advertisement
Related Products
HP Workstation z200 CMT
HP Z200 - Small Form Factor Workstation
HP Z200 Series
HP Z210 Series
HP Z220 SFF Series
HP Z230 SFF Workstation
HP Z240 Small Form Factor
HP Z228
HP Z2 SFF G5
HP Z2 Mini G9
HP Categories
Desktop
Laptop
Server
Monitor
Switch
More HP Manuals
Login
Sign In
OR
Sign in with Facebook
Sign in with Google
Upload manual
Upload from disk
Upload from URL