Sign In
Upload
Manuals
Brands
HP Manuals
Desktop
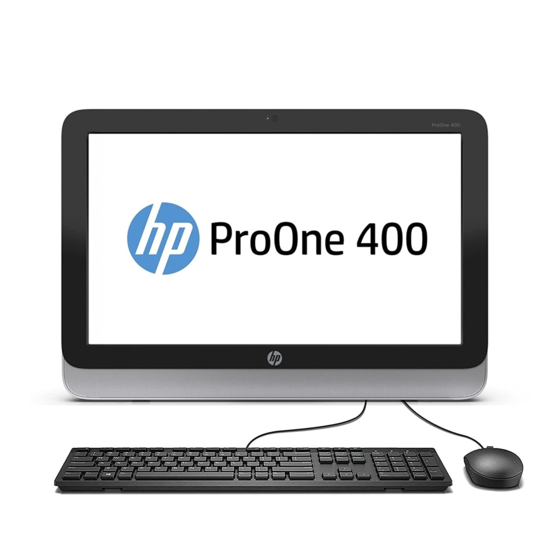
ProOne 400 G1
HP ProOne 400 G1 Manuals
Manuals and User Guides for HP ProOne 400 G1. We have
6
HP ProOne 400 G1 manuals available for free PDF download: Maintenance & Service Manual, Hardware Reference Manual, Specification
HP ProOne 400 G1 Maintenance & Service Manual (192 pages)
All-in-One Business PC
Brand:
HP
| Category:
Desktop
| Size: 8.2 MB
Table of Contents
Table of Contents
5
1 Product Features
11
Overview
11
Front Components
13
Side Components
14
Rear Components
15
Adjusting the Stand
16
Serial Number Location
17
2 Display Options
18
Adjusting the Audio Signal
18
Adjusting Display Brightness
18
3 Activating and Customizing the Software
20
Activating and Customizing the Software in Windows 7
20
Activating the Windows Operating System
20
Downloading Windows 7 Updates
21
Installing or Upgrading Device Drivers
21
Customizing the Monitor Display
21
Activating and Customizing the Software in Windows 8
21
Activating the Windows Operating System
21
Downloading Windows 8 Updates
22
Customizing the Monitor Display
22
4 Illustrated Parts Catalog
23
System Unit
23
Misc Parts
25
Boards
26
Keyboards
27
Cables
28
Drives
28
Sequential Part Number Listing
29
5 Routine Care, SATA Drive Guidelines, and Disassembly Preparation
32
Electrostatic Discharge Information
32
Generating Static
33
Preventing Electrostatic Damage to Equipment
33
Personal Grounding Methods and Equipment
34
Grounding the Work Area
34
Recommended Materials and Equipment
34
Operating Guidelines
35
Routine Care
36
General Cleaning Safety Precautions
36
Cleaning the Computer Case
36
Cleaning the Keyboard
36
Cleaning the Monitor
37
Cleaning the Mouse
37
Service Considerations
37
Tools and Software Requirements
37
Screws
38
Cables and Connectors
38
Hard Drives
38
Lithium Coin Cell Battery
39
SATA Hard Drives
39
SATA Hard Drive Cables
40
SATA Data Cable
40
SMART ATA Drives
40
Cable Management
40
6 Removal and Replacement Procedures All-In One (AIO) Chassis
41
Preparing to Disassemble the Computer
41
Installing an Rear Cover Security Screw
42
Synchronizing the Optional Wireless Keyboard and Mouse
43
Rear Cover
44
Stand
45
Replacing Drives
47
Replacing a Hard Drive
48
Removing a 3.5-Inch Hard Drive
48
Removing a Hard Drive
48
Removing a 2.5-Inch Solid State Drive (SSD), Self-Encrypting Drive (SED), or Solid State Hybrid Drive (SSHD)
51
Installing a 3.5-Inch Hard Drive
53
Installing a Hard Drive
53
Installing a 2.5-Inch Solid State Drive (SSD), Self-Encrypting Drive (SED), or Solid State Hybrid Drive (SSHD)
54
Replacing the Optical Disc Drive
55
Webcam Module
58
Speakers
60
Antenna
62
Bottom Stand
63
Front Bezel
65
Power Button Board
66
Touch Controller Board
68
Converter Board
69
VESA Panel
71
System Board Shield
72
Memory
74
Sodimms
74
DDR3-SDRAM Sodimms
74
Populating SODIMM Sockets
75
Installing Sodimms
75
Battery
78
Fan
80
Heat Sink
82
Processor
84
WLAN Module
86
Hard Drive and Optical Drive Cables and Connectors
88
System Board
90
Display Panel
92
Cable Routing
99
7 Computer Setup (F10) Utility
100
Computer Setup (F10) Utilities
100
Using Computer Setup (F10) Utilities
101
Computer Setup-File
102
Computer Setup-Storage
103
Computer Setup-Security
105
Computer Setup-Power
108
Computer Setup-Advanced
109
Recovering the Configuration Settings
111
8 HP PC Hardware Diagnostics
112
Why Run HP PC Hardware Diagnostics - UEFI
112
How to Access and Run HP PC Hardware Diagnostics - UEFI
112
Downloading HP PC Hardware Diagnostics to a USB Device
113
9 Troubleshooting Without Diagnostics
114
Safety and Comfort
114
Before You Call for Technical Support
114
Helpful Hints
115
Solving General Problems
117
Solving Power Problems
121
Solving Hard Drive Problems
123
Solving Media Card Reader Problems
126
Solving Display Problems
128
Solving Audio Problems
133
Solving Printer Problems
135
Solving Keyboard and Mouse Problems
137
Solving Hardware Installation Problems
139
Solving Network Problems
141
Solving Memory Problems
145
Solving Processor Problems
147
Solving CD-ROM and DVD Problems
148
Solving USB Flash Drive Problems
150
Solving Front Panel Component Problems
152
Solving Internet Access Problems
152
Solving Software Problems
154
Contacting Customer Support
156
10 Backup and Recovery
157
Restoring and Recovering in Windows 7
157
System Restore
157
System Recovery
158
System Recovery When Windows Is Responding
158
System Recovery Using Recovery Media
159
System Recovery When Windows Is Not Responding
159
Creating Recovery Media
160
Using Recovery Media
162
Backup and Recovery in Windows 8
163
Backing up Your Information
163
Performing a System Recovery
164
Using the Windows Recovery Tools
164
Using F11 Recovery Tools
165
Using Windows 8 Operating System Media (Purchased Separately)
165
11 POST Error Messages
167
POST Numeric Codes and Text Messages
168
Interpreting POST Diagnostic Front Panel Leds
176
12 Password Security and Resetting CMOS
179
Establishing a Setup or Power-On Password
180
Resetting the Setup and Power-On Password
181
Clearing and Resetting the CMOS
182
Appendix A Power Cord Set Requirements
184
General Requirements
184
Japanese Power Cord Requirements
184
Country-Specific Requirements
185
Appendix B Statement of Volatility
186
Appendix C Specifications
188
Index
190
Advertisement
HP ProOne 400 G1 Maintenance & Service Manual (184 pages)
23-inch Non-Touch All-in-One Business PC
Brand:
HP
| Category:
Desktop
| Size: 8.38 MB
Table of Contents
About this Book
3
Table of Contents
5
1 Product Features
11
Overview
11
Front Components
13
Side Components
14
Rear Components
15
Adjusting the Stand
16
Serial Number Location
17
2 Activating and Customizing the Software
18
Activating and Customizing the Software in Windows 7
18
Activating the Windows Operating System
18
Downloading Windows 7 Updates
19
Installing or Upgrading Device Drivers
19
Customizing the Monitor Display
19
Activating and Customizing the Software in Windows 8
19
Activating the Windows Operating System
19
Downloading Windows 8 Updates
20
Customizing the Monitor Display
20
3 Illustrated Parts Catalog
21
System Unit
21
Misc Parts
23
Boards
24
Keyboards
25
Drives
26
Cables
27
4 Routine Care, SATA Drive Guidelines, and Disassembly Preparation
28
Electrostatic Discharge Information
28
Generating Static
29
Preventing Electrostatic Damage to Equipment
29
Personal Grounding Methods and Equipment
30
Grounding the Work Area
30
Recommended Materials and Equipment
30
Operating Guidelines
31
Routine Care
32
General Cleaning Safety Precautions
32
Cleaning the Computer Case
32
Cleaning the Keyboard
32
Cleaning the Monitor
33
Cleaning the Mouse
33
Service Considerations
33
Tools and Software Requirements
33
Screws
34
Cables and Connectors
34
Hard Drives
34
Lithium Coin Cell Battery
35
SATA Hard Drives
35
SATA Hard Drive Cables
36
SATA Data Cable
36
SMART ATA Drives
36
Cable Management
36
5 Removal and Replacement Procedures All-In One (AIO) Chassis
37
Preparing to Disassemble the Computer
37
Installing an Rear Cover Security Screw
38
Synchronizing the Optional Wireless Keyboard and Mouse
39
Rear Cover
40
Stand
41
Replacing Drives
43
Replacing a Hard Drive
44
Removing a 3.5-Inch Hard Drive
44
Removing a Hard Drive
44
Removing a 2.5-Inch Solid State Drive (SSD), Self-Encrypting Drive (SED), or Solid State Hybrid Drive (SSHD)
46
Installing a 3.5-Inch Hard Drive
48
Installing a Hard Drive
48
Installing a 2.5-Inch Solid State Drive (SSD), Self-Encrypting Drive (SED), or Solid State Hybrid Drive (SSHD)
49
Replacing the Optical Disc Drive
50
Webcam Module
53
Speakers
55
Antenna
57
Bottom Stand
58
Front Bezel
60
Power Button Board
61
Converter Board
63
VESA Panel
65
System Board Shield
66
Memory
67
Sodimms
67
DDR3-SDRAM Sodimms
67
Populating SODIMM Sockets
68
Installing Sodimms
68
Battery
71
Fan
73
Heat Sink
75
Processor
77
WLAN Module
79
Hard Drive and Optical Drive Cables and Connectors
81
System Board
83
System Board Callouts
86
Display Panel
88
Cable Routing and Component Installation
92
6 Computer Setup (F10) Utility
93
Computer Setup (F10) Utilities
93
Using Computer Setup (F10) Utilities
94
Computer Setup-File
95
Computer Setup-Storage
96
Computer Setup-Security
98
Computer Setup-Power
101
Computer Setup-Advanced
102
Recovering the Configuration Settings
104
7 HP PC Hardware Diagnostics
105
Why Run HP PC Hardware Diagnostics
105
How to Access and Run HP PC Hardware Diagnostics
105
Downloading HP PC Hardware Diagnostics to a USB Device
106
8 Troubleshooting Without Diagnostics
107
Safety and Comfort
107
Before You Call for Technical Support
107
Helpful Hints
108
Solving General Problems
110
Solving Power Problems
114
Solving Hard Drive Problems
116
Solving Media Card Reader Problems
119
Solving Display Problems
121
Solving Audio Problems
126
Solving Printer Problems
128
Solving Keyboard and Mouse Problems
130
Solving Hardware Installation Problems
132
Solving Network Problems
134
Solving Memory Problems
138
Solving Processor Problems
140
Solving CD-ROM and DVD Problems
141
Solving USB Flash Drive Problems
143
Solving Front Panel Component Problems
144
Solving Internet Access Problems
145
Solving Software Problems
146
Contacting Customer Support
148
9 Backup and Recovery
149
Restoring and Recovering in Windows 7
149
System Restore
149
System Recovery
150
System Recovery When Windows Is Responding
150
System Recovery Using Recovery Media
151
System Recovery When Windows Is Not Responding
151
Creating Recovery Media
152
Using Recovery Media
153
Backup and Recovery in Windows 8
154
Backing up Your Information
154
Performing a System Recovery
155
Using the Windows Recovery Tools
155
Using F11 Recovery Tools
156
Using Windows 8 Operating System Media (Purchased Separately)
156
10 POST Error Messages
158
POST Numeric Codes and Text Messages
159
Interpreting POST Diagnostic Front Panel Leds
167
11 Password Security and Resetting CMOS
170
Establishing a Setup or Power-On Password
171
Resetting the Setup and Power-On Password
171
Changing a Setup or Power-On Password
173
Deleting a Setup or Power-On Password
173
Clearing and Resetting the CMOS
174
Appendix A Statement of Volatility
176
Appendix B Power Cord Set Requirements
178
General Requirements
178
Japanese Power Cord Requirements
178
Country-Specific Requirements
179
Appendix C Specifications
180
Index
182
HP ProOne 400 G1 Hardware Reference Manual (58 pages)
Brand:
HP
| Category:
Desktop
| Size: 4.03 MB
Table of Contents
About this Book
3
Table of Contents
5
1 Product Features
7
Overview
7
Front Components
9
Side Components
10
Rear Components
11
Keyboard Features
12
Adjusting the Stand
13
Waking the Computer
13
Serial Number Location
14
2 Display Options
15
Adjusting the Audio Signal
15
Adjusting Display Brightness
15
3 Hardware Repair and Upgrade
17
Warnings and Cautions
17
Additional Information
17
Connecting and Disconnecting Power
18
Connecting Power
18
Disconnecting Power
18
Installing a Cable Lock
19
Installing an Access Panel Security Screw
20
Synchronizing the Optional Wireless Keyboard and Mouse
21
Removing Batteries from the Optional Wireless Keyboard or Mouse
22
Attaching the Computer to a Mounting Fixture
23
Connecting a Second Display
25
Locating Internal Components
27
Removing and Installing Memory
27
Sodimms
27
DDR3-SDRAM Sodimms
27
Populating SODIMM Sockets
29
Installing Sodimms
29
Replacing the Battery
33
Replacing Drives
38
Replacing a Hard Drive
38
Removing a Hard Drive
38
Removing a 3.5-Inch Hard Drive
38
Removing a 2.5-Inch Solid State Drive (SSD), Self-Encrypting Drive (SED), or Solid State Hybrid Drive (SSHD)
41
Installing a Hard Drive
45
Installing a 3.5-Inch Hard Drive
45
Installing a 2.5-Inch Solid State Drive (SSD), Self-Encrypting Drive (SED), or Solid State Hybrid Drive (SSHD)
47
Replacing the Optical Disc Drive
49
Appendix A Electrostatic Discharge
54
Preventing Electrostatic Damage
54
Grounding Methods
54
Appendix B Computer Operating Guidelines, Routine Care, and Shipping Preparation
55
Computer Operating Guidelines and Routine Care
55
Optical Disc Drive Precautions
56
Shipping Preparation
56
Index
57
Advertisement
HP ProOne 400 G1 Hardware Reference Manual (53 pages)
Brand:
HP
| Category:
Desktop
| Size: 3.71 MB
Table of Contents
About this Book
3
Table of Contents
5
1 Product Features
7
Overview
7
Front Components
9
Side Components
10
Rear Components
11
Keyboard Features
12
Adjusting the Stand
13
Serial Number Location
13
2 Hardware Repair and Upgrade
14
Warnings and Cautions
14
Additional Information
14
Connecting and Disconnecting Power
15
Connecting Power
15
Disconnecting Power
15
Installing a Cable Lock
16
Installing an Access Panel Security Screw
16
Synchronizing the Optional Wireless Keyboard and Mouse
17
Removing Batteries from the Optional Wireless Keyboard or Mouse
18
Attaching the Computer to a Mounting Fixture
19
Connecting a Second Display
21
Locating Internal Components
23
Removing and Installing Memory
23
Sodimms
23
DDR3-SDRAM Sodimms
23
Populating SODIMM Sockets
25
Installing Sodimms
25
Replacing the Battery
29
Replacing Drives
34
Replacing a Hard Drive
34
Removing a 3.5-Inch Hard Drive
34
Removing a Hard Drive
34
Removing a 2.5-Inch Solid State Drive (SSD), Self-Encrypting Drive (SED), or Solid State Hybrid Drive (SSHD)
37
Installing a 3.5-Inch Hard Drive
40
Installing a Hard Drive
40
Installing a 2.5-Inch Solid State Drive (SSD), Self-Encrypting Drive (SED), or Solid State Hybrid Drive (SSHD)
42
Replacing the Optical Disc Drive
44
Appendix A Electrostatic Discharge
49
Preventing Electrostatic Damage
49
Grounding Methods
49
Appendix B Computer Operating Guidelines, Routine Care, and Shipping Preparation
50
Computer Operating Guidelines and Routine Care
50
Optical Disc Drive Precautions
51
Shipping Preparation
51
Index
52
HP ProOne 400 G1 Specification (48 pages)
All-in-One Business PC (21.5” Touch)
Brand:
HP
| Category:
Desktop
| Size: 0.85 MB
HP ProOne 400 G1 Specification (47 pages)
HP ProOne 400 G1 All-in-One Business PC (21.5” Touch)
Brand:
HP
| Category:
Desktop
| Size: 0.84 MB
Advertisement
Related Products
HP ProDesk 400 G2
HP ProDesk 400 G2.5
HP ProDesk 400 G3 MT
HP ProDesk 400 G4
HP ProDesk 400 G6 MT
HP ProDesk 400 G5
HP ProDesk 400 G7 SFF
HP ProDesk 400 G2.5 SFF
HP ProDesk 4000 G3 MT
HP ProOne 400 23.8-inch G4 All-in-One Business PC
HP Categories
Desktop
Laptop
Server
Monitor
Switch
More HP Manuals
Login
Sign In
OR
Sign in with Facebook
Sign in with Google
Upload manual
Upload from disk
Upload from URL