Sign In
Upload
Manuals
Brands
FUJITSU Manuals
Laptop
LIFEBOOK E549
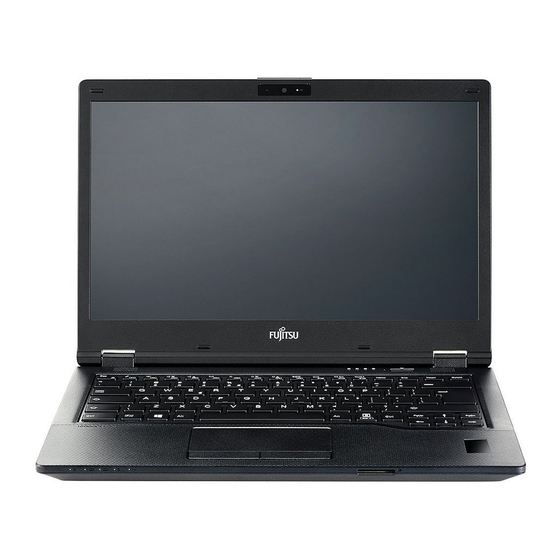
FUJITSU LIFEBOOK E549 14-inch Laptop Manuals
Manuals and User Guides for FUJITSU LIFEBOOK E549 14-inch Laptop. We have
1
FUJITSU LIFEBOOK E549 14-inch Laptop manual available for free PDF download: Operating Manual
FUJITSU LIFEBOOK E549 Operating Manual (111 pages)
Brand:
FUJITSU
| Category:
Laptop
| Size: 3.78 MB
Table of Contents
Table of Contents
5
Declarations of Conformity
9
Fujitsu Contact Information
10
Notational Conventions
11
Ports and Controls
12
Fujitsu Lifebook E549
12
Fujitsu Lifebook E559
15
Important Notes
18
Safety Instructions
19
Additional Safety Notes for Devices with Radio Components
20
Energy Saving
20
Energy Saving under Windows
20
Traveling with Your Notebook
20
Before You Travel
21
Transporting the Notebook
22
Cleaning the Notebook
22
First-Time Setup of Your Device
23
Unpacking and Checking the Device
23
Choose a Location
24
Connecting the AC Adapter
24
Switching on the Device for the First Time
25
Installing Bonus Apps
25
Working with the Notebook
26
Status Indicators
26
Switching the Notebook on
29
Switching the Notebook off
29
Keyboard
30
Hot Keys and Function Keys
33
F-Lock Setting
35
Key Combinations
35
Virtual Number Keys
37
Separate Number Keypad
38
Keyboard with Background Lighting (Optional)
38
Country and Keyboard Settings
38
Touchpad and Touchpad Buttons
39
Moving the Pointer
39
Selecting an Item
39
Executing Commands
39
Dragging Items
40
LCD Screen
40
Webcam
41
Rechargeable Battery
42
Charging, Caring for and Maintaining the Battery
42
Removing and Installing the Battery
43
Using the Energy Saving Functions
45
Adjust the Fan Control
46
Memory Cards
47
Supported Formats
47
Inserting the Memory Card
47
Removing the Memory Card
47
Speaker and Microphone
48
Wireless Lan/Bluetooth Wireless Components
48
Switching the Wireless Components on and off
48
Configuring WLAN Access
48
Further Information on WLAN and Bluetooth
48
Ethernet and LAN
49
Your Port Replicator
50
Ports on the Port Replicator
50
Connecting the Notebook to the Port Replicator
51
Connecting the AC Adapter to the Port Replicator
52
Switching on the Notebook Via the Port Replicator
52
Disconnecting the Notebook from the Port Replicator
53
Security Functions
54
Configuring the Fingerprint Sensor
54
Setting up the Palm Vein Sensor
55
Using the Security Lock
55
Configuring Password Protection in BIOS Setup Utility
56
Protecting BIOS Setup Utility (Supervisor Password and User Password)
56
Password Protection for Booting the Operating System
58
Password Protection for the Hard Disk
58
Trusted Platform Module - TPM (Device Dependent)
59
Enabling TPM
59
Disabling TPM
59
Smart Card Reader
60
Inserting the Smart Card
60
Connecting External Devices
61
Connecting an External Monitor
61
Connecting USB Devices
63
USB Port with Charging Function (USB Type-C)
64
USB Port with Charging Function (Anytime USB Charge)
65
How to Remove USB Devices Correctly
65
Headset Port
66
Removing and Installing Components During Servicing
67
Notes on Installing and Removing Boards and Components
67
Preparing to Remove Components
68
Remove the Cover
69
Removing and Installing Memory Expansion
70
Removing a Memory Module
70
Installing a Memory Module
71
Installing and Removing an M.2 Module (Dependent on Configuration)
71
Installing the M.2 Module
72
Removing the M.2 Module
72
Installing and Removing the Hard Disk
73
Level)
73
Removing the Hard Disk
73
Installing a Hard Disk
74
Attaching the Cover
75
Finishing Component Removal
75
Settings in BIOS Setup Utility
76
Starting the BIOS Setup Utility
76
BIOS Setup Utility Operation
77
Exiting BIOS Setup Utility
78
Exit Saving Changes - Save Changes and Exit BIOS Setup Utility
78
Exit Discarding Changes - Reject Changes and Exit BIOS Setup Utility
78
Load Setup Defaults - Load Default Values
78
Discard Changes - Discard Changes Without Exiting BIOS Setup Utility
78
Save Changes - Save Changes Without Exiting the BIOS Setup Utility
78
Save Changes and Power off
78
Troubleshooting and Tips
79
Help if Problems Occur
79
If You Need to Restore Your System
79
The Notebook's Date or Time Is Incorrect
80
When Certain Characters Are Entered on the Keyboard, Only Numerals Are Written
80
The Notebook's LCD Screen Remains Blank
80
The LCD Screen of the Notebook Is Difficult to Read
80
The External Monitor Remains Blank
81
The External Monitor Is Blank or the Image Is Unstable
81
The Notebook Does Not Start after Switching It on
82
The Notebook Stops Working
82
The Printer Does Not Print
82
The Wireless Connection to a Network Does Not Work
83
Acoustic Warning
83
Smart Card Reader Is Not Recognized
83
Smart Card PIN Forgotten
83
Smart Card Lost
83
Error Messages on the Screen
84
Technical Data
86
Lifebook
86
WLAN Specifications
87
Rechargeable Battery
88
Notebook Network Adapter
88
Network Adapter Port Replicator
88
Manufacturer's Notes
89
Disposal and Recycling
89
Recycling Your Battery
89
DOC (Industry CANADA) Notices
90
UL Notice
90
ENERGY STAR Compliance
91
FCC and IC Regulatory Information
92
Regulatory Notes and Statements
92
Canadian Notice / Avis Pour Le Canada
95
Canadian Notice
95
Avis Pour Le Canada
95
Appendix
96
Before Using the Optional Wireless LAN
96
Wireless LAN Devices Covered by this Document
96
Characteristics of the WLAN Device
96
Wireless LAN Modes Using this Device
97
Deactivating/Disconnecting the WLAN Device
99
Configuring the Wireless LAN
100
Configuring the WLAN Using Windows
100
Connection to the Network
100
Troubleshooting the WLAN
101
Using the Bluetooth Device
103
Image Backup and Recovery Procedures
104
Windows 10 Procedures
104
Creating a Recovery Drive
104
Recovery Options in Windows 10
104
Downloading Driver Updates
107
Index
108
Advertisement
Advertisement
Related Products
Fujitsu LIFEBOOK E544
Fujitsu LIFEBOOK E546
Fujitsu LIFEBOOK E548
Fujitsu LIFEBOOK E5410
Fujitsu LIFEBOOK E5412
Fujitsu LIFEBOOK E547
Fujitsu LIFEBOOK E5413
Fujitsu Lifebook E5140
Fujitsu Lifebook E5320
Fujitsu LIFEBOOK E5510
FUJITSU Categories
Air Conditioner
Laptop
Server
Scanner
Storage
More FUJITSU Manuals
Login
Sign In
OR
Sign in with Facebook
Sign in with Google
Upload manual
Upload from disk
Upload from URL