Sign In
Upload
Manuals
Brands
Canon Manuals
Printer
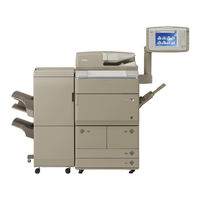
iR-ADV 6075 230V AU
Canon iR-ADV 6075 230V AU Manuals
Manuals and User Guides for Canon iR-ADV 6075 230V AU. We have
1
Canon iR-ADV 6075 230V AU manual available for free PDF download: Manual
Canon iR-ADV 6075 230V AU Manual (327 pages)
Symptoms & Solutions
Brand:
Canon
| Category:
Printer
| Size: 28.93 MB
Table of Contents
Table of Contents
4
[Top 10 Symptoms]
9
[Pickup Jam / Paper Feeding Path Jam]
9
0117/0118 Jam Codes: Multi-Feed Due to Poor Pick-Up Separation
9
0101/0106/010A/010D/0102/0107/010B/010E Jam Code Due to Multi Feeding Resulting from Picked-Up Paper Separation Failure
11
0101/0102/0106/0107 Jam Code Due to the Contamination on the Paper Sensor (Scanner Sensor)
16
010B/010D/010E/0117/0118 Jam Code Due to the Contamination on the Paper Sensor (Scanner Sensor)
20
Assembly on the Right Door Assembly
23
0101/0106/010A/010D Jam Code Due to the Contamination on the Paper Sensor (Scanner Sensor) on Ir-ADV 8105 Series Only
30
Sensor (Scanner Sensor)
33
0105/0205 Jam Code Due to Pieces of Paper Remained in the Registration Unit
36
0105/0205 Jam Codes Owing to the Deformation of the Registration Unit
37
0104/0105/0218 Jam Code Due to Slip of the Pre-Registration Roller
40
0105/0205 Due to the Life of the Multi-Purpose Tray Pickup Roller
42
0205 Jam Occurs Due to the Deformation of the Pre-Transfer Guide
43
0105 Jam Code/Skewed Paper Feed Due to Deformation of the Registration Assembly
46
0115 Jam Code Due to the Torsion Spring of the Reverse Flapper Coming off
49
0101/0106 Jam Code
50
0105/0218 Jam Code: Resolved by Replacing the Pre Registration Roller (PD-C1/POD Deck Lite-A1)
51
0104 Jam Code (POD Deck Lite-A1)
51
0204/0208 Jam Error Codes
52
0101/0102/0106/0107 Jam Code Due to Abrasion of the Pickup Roller
55
When the Finisher Is Re-Connected, "Delivery Setting" Is Initialized with the System Software Earlier than Ver.41.03
56
[Delivery / Fixing Jam]
57
0111/0C10/0112/0212 Jam Caused by Wearing Separation Claw of Drum
57
0111/0C10/0112 Jam Code Occurs Because the Leading Edge Transfer Target Current Is too Strong
58
0111/0C10/0112 Jam Code Due to Failure of the Transfer High Voltage PCB
59
0C10/0112/0113 Jam Code Due to a Piece of Paper Remained after Jam Removal
63
0C10/0112/0113/0213/0114/0115 Jam Code Owing to the Defect of the Reverse Upper Flapper
65
0111/0C10/0112/0113/0114 Jam Code Emerges Owing to the Defective Upper Separation Claw Ot the Fixing Assembly
66
0C10/0112/0113/0213 Jam Codes Because of the Sliding Level of the Bushings in the Delivery Reverse Drive Unit/ the Reverse Paper Delivery Assembly Being Deteriorated
67
0213 Jam Code Due to Deformation of the Frame in the Outer Paper Delivery Assembly
78
0113 Jam Code with Face down Delivery: Resolved by Replacing the Reverse Motor [G]
80
0113/0213 Jam Code at Face Down: Due to Installation Error of Delivery Motor [G]
80
0113/0213 Jam Code: Solved by Replacing One-Way Gear and Bearings [G]
81
[Solid Image/Smudged Image/Streaked Image]
82
Roller
82
A Line Appears in the Paper Feed Direction Because Dust Gets into the Dust Proof Glass/ Primary Charging Assembly Downstream Duct/ Developing Assembly Sleeve Cover
84
Image Soil/Smear Due to Drum Cleaning Failure
89
Image Soil/Smear Due to the Failure in Installing the Blade Retainer
93
Streaked Image or Spots on an Image Due to Contamination of the Primary Charging Wire and the Dustproof Filter
98
Stained Image at the Intervals of Approx. 264Mm/ Approx. 127Mm/ Approx. 63Mm/ Approx. 53Mm
100
Soiled Image Due to the Deformation of the Pre-Transfer Guide
101
Toner Adheres to the Leading Edge of Paper Because of the Deformed Guide Stopper of the Pre-Transfer Charging Assembly
105
Line in Horizontal Scanning Direction at Trailing Edge of Image after Replacement of ETB
107
White Lines in Vertical Scanning Direction on Halftone Image at Installation or at Replacement of Developing Assembly
108
Black Random Spots on Copies: Due to the Return Spring Fell off the Pre-Transfer Dust Collection Roller
109
White Line Appears When Mounting the Developing Assembly
110
Toner Is Scattered Around the Developing Assembly Since the Buffer Shutter Moves out of the Position
112
Black Dots on Image Due to Soiling of Primary Charging Wire
114
Image Soil/Smear Due to Drum Cleaning Failure
115
Image Soil/Smear Due to the Failure in Installing the Blade Retainer
119
Soiled Image Due to the Timing Belt Coming off in the Waste Toner Feed Assembly
123
Stained Image Due to the Separation Claw Contacting with the ETB
127
[Finisher Jam / Uneven Stacking]
131
E535-0004/1122/10E0 Jam Code or Misalignment Due to Software Failure of SORTER Ver.34.00 or before (Booklet/Staple Finisher-D1)
131
1122 Jam May Occur at the Paper Feed Dispose Assembly During the Finisher Is Operating
132
1011/ 1121/ 1122 Jam Codes Due to Failure in Roller Shafts Rotation (Staple/ Booklet Finisher-D1)
139
Paper Stacking Fault/Paper Fall from the Tray/Paper Misalignment (Booklet/Staple Finisher-D1)
143
1121/1124 Jam Codes Due to Malfunction of the Swing Guide Assembly (Booklet/Staple Finisher-B1/E1)
149
Paper Overhanging the Edge or Uneven Stacking in the Finisher Tray (Booklet/Staple Finisher-D1)
152
E530-8002/1122/112F Jam Codes When Printed in Mixed Paper Widths (Booklet/Staple Finisher-D1)
154
Paper Delivery Failure/Stacking Failure Due to Breakage in Tension Spring of Finisher (Finisher-D1)
155
Poor Paper Alignment While Printing Booklet in Saddle Stitch Due to the Broken Tension Spring (Booklet Finisher-D1/Booklet Finisher-F1)
159
0CA4 Jam Code Upon the Main Power SW on (Staple/Booklet Finisher-F1)
166
0CA4/1E00 Jam Code Occurs with the Finisher System Software of Version Earlier than 26.03 after Removing Sheets of Paper from the Processing Tray (Staple/Booklet Finisher-D1)
167
1F8F Jam Code Occurs with Versions of Finisher System Software Earlier than Ver. 29.02 (Staple/Booklet Finisher-D1)
168
1096/11A1/11A2/11A3 Jam Codes Due to the Faulty Finisher Software SDL-STCH (Booklet Fin-D1)
168
[Professional Puncher Jam]
169
1165 Jam Code Intermittent [G]
169
1F77 Jam Code (Professional Puncher-C1) [G]
169
1F77 Jam at New Install [G]
170
1F77 Jam Code During Punch or Non-Punch Jobs: Due to Professional Puncher Front Door Latch Mounting Screws Were Loose
171
1F77 Jam at Installation: Due to the Jumper on the Punch Controller was Moved to the Wrong Position (Professional Punch-C1)
172
1F77 Jam Code: Resolved by Replacing the S3 Paper Path 2 Sensor (Professional Puncher-C1)
173
1F77 Jam Code: Due to the Flexible Aligner Drive Shaft was Broken (Professional Puncher-C1)
173
1F78 Jam Code Is Occurring, Only after the Punch Dye Is Inserted: Solved by Leveling out Professional Punch and the Integration Unit through Adjusting the Casters
174
1F77 Jam Code : When Punching : Solved by Replacing Communication Cable (Pro Puncher-C1)
174
1152 Jam Code (Professional Puncher-C1)
175
11B3/11B5/11B7/1F07/1FC2/1103/1164/1165/1166/1F5E/1F77/1152 Jam Code Due to Detachment of Spring (Professional Puncher-C1/Professional Puncher Integration Unit-B1)
176
Pro Puncher-C1 Not Punching: Due to the Paper Sensor was Not Plugged [G]
180
Pro Punch Not Punching [G]
180
[Duplex Jam]
181
0213 Jam Code Due to Deformation of the Frame in the Outer Paper Delivery Assembly
183
0115/0215 Jam Code Due to Failure of the Duplex Motor
185
0215/0208/0209 Jam Codes or Skew Occur Due to Deformation of the Duplexing Lower Guide
187
0115 Jam Code Due to the Torsion Spring of the Reverse Flapper Coming off
196
0108/0208/0209 Jam Code Due to Operation Failure of the Side Registration Motor
197
0108/0208/0209 Jam Codes Due to Operation Failure of the Duplex Merging Flapper
200
0208/0209/0104 Jam Code Due to Pieces of Paper Remained after Jam Removal
204
[Feeder Jam]
206
0094 Jam Code Remains to be Displayed Due to the Peeling Double-Stick Tape on the Registration Sensor Reflector (Duplex Color Image Reader-C1/Color Image Reader-C1)
206
0002/0003/0004 Jam Code Multi Feed Due to Originals Having Low Separation Performance
208
0045/0047/0049 Jam Codes Due to the Turned up Sheet of the Registration Guide
217
[E001]
223
E001-0004/E001-0010 Due to Disconnection of Fixing Sub Thermistor 2 (THM4)
223
[E503]
224
E503-0041/E503-0051 Due to the Problem of PUNCH-IF, the System of Professional Puncher Integration Unit-B1, Prior to Ver.11.01
224
E503-0003 Mainly on Installation
224
E503-0053: Solved by Switching Service Switch (Professional Puncher-C1)
225
E503-0041 with Optional Professional Puncher Integration Unit-B1
226
[Line Image (by Stream Read Glass)]
227
Lines on Images When Using DADF (Duplex/Color Image Reader Unit-C1) [G]
227
There Are Lines through Copies, When Using the ADF (Duplex Color Image Reader Unit-C1) [G]
227
Black Line When Using DADF Stream Reading (Duplex Color Image Reader Unit-C1/Color Image Reader Unit-C1)
228
Black Band Appears in Sub Scanning Direction When Scanning both Sides Simultaneously at DADF (Duplex Color Image Reader Unit-C1)
229
[Roller Marks Image (Finisher Roller/Pro Puncher/ Fixing Roller)]
235
Stain on the Backside Image Due to the Soiled Pressure Roller
235
When Using the Puncher, Roller Marks Appears on the Image Due to the Friction of Drive Roller. (Professional Puncher-C1)
245
Line (Crepe Mark) in Horizontal Scanning Direction Due to Temperature Rising on Fixing Roller Edges at Continuous Print
248
Roller-Width Soils at 143Mm from Paper Edge
249
Soiling at Back of Sheet (Staple Finisher-D1/Booklet Finisher-D1)
257
Roller Marks on Images Due to the Friction of the Pull Roller When Using Booklet/Folding Function
258
[Light Image]
263
Fine Line Is too Fine on Output Printed with the Printer Driver Pcl5E/Pcl6
263
Fine Line Is too Fine on Output Printed with the Printer Driver PS
265
Fine Line Is too Fine on Output Printed with the Printer Driver UFRII
267
Light Image/ Extremely Narrow Thin Lines When Copying/ Printing
269
Uneven Image Density at the Front Side and the Rear Side Due to the Difference of the Hight of the Primary Charging Wire
271
Light Printout in the Rear Due to Soils on the Pre-Transfer Charging Wire
273
Light Image/ Partially Blank Image/ Black Line
274
Contact/ the Defective Transfer H.V. PCB
277
[Others]
284
E840-0001 Due to Deformation of the Fixing Shutter
284
Toner Bottle Cannot to be Mounted Due to Breakage of Bottle Cam/Drive Gear
289
Paper Skew or the Right Door May Open Involuntarity Due to the Half-Locked Right Door
301
E677-0080/E315-000D for Output from Imagepass-U1
307
E583-8001/E583-8002 Due to Operation Failure of the Tray Auxiliary Guide (Booklet/Staple Fin-D1)
308
[Staple Jam]
312
Stapler Does Not Staple. the Finisher will Not Staple Sort any Sets. [G]
312
Staple Does Not Work with the Printer Driver UFRII Ver.20.80 or Later
314
[Ir-ADV 8105 Series Cleaning Location Inside Machine]
315
Hopper Assembly
316
Pre Transfer Charging Assembly
317
Registration Assembly
318
Fixing Entrance Guide Assembly
319
Pre-Registration Guide Assembly
320
AP Kit (Drum Separation Claw & Guide Plate)
321
Guide to Insert AP Kit
322
Developing Assembly
323
Developing Assembly Guide Mount
324
[Professional Puncher-C1 die Oiling Procedure]
325
Advertisement
Advertisement
Related Products
Canon iR-ADV 6075 230V EUR
Canon iR-ADV 6075 230V
Canon IMAGERUNNER ADVANCE 6075i
Canon iR-ADV 6075G V2 120V
Canon iR-ADV 6075 120V
Canon Oce VarioPrint 6000 TP+ Series
Canon iR-ADV 6055 120V
Canon iR-ADV 6065 230V AU
Canon iR-ADV 6055 230V AU
Canon varioPRINT 600 TITAN Series
Canon Categories
Printer
Digital Camera
All in One Printer
Camcorder
Scanner
More Canon Manuals
Login
Sign In
OR
Sign in with Facebook
Sign in with Google
Upload manual
Upload from disk
Upload from URL