Sign In
Upload
Manuals
Brands
Aastra Manuals
Server
AXS6
Aastra AXS6 MiVoice 5000 AXS-Gateway Manuals
Manuals and User Guides for Aastra AXS6 MiVoice 5000 AXS-Gateway. We have
1
Aastra AXS6 MiVoice 5000 AXS-Gateway manual available for free PDF download: Installation And Maintenance Manual
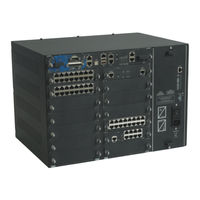
Aastra AXS6 Installation And Maintenance Manual (502 pages)
Aastra 5000 Server Installation and Maintenance Manual
Brand:
Aastra
| Category:
Server
| Size: 15.5 MB
Table of Contents
Table of Contents
3
Table of Contents
14
Table of Contents
23
1 Introduction
27
Purpose of this Document
27
Target Audience for the Document
28
Reference Documents
29
Abbreviations
30
Terms and Expressions
31
2 Presentation
37
Presentation of Aastra X Series Products
37
Functional and Physical Architecture of the Ipbxs
39
Aastra XS/XL
40
Overview of the Functions
41
Physical Description
43
Description et Caractéristiques D'un Pbx
43
Internal Description
44
Figure 3.4 Overview of an A3XD Cabinet in Simplex Configuration
48
Figure 3.5 Overview of an AXD Cabinet in Simplex Configuration with Secure Power Unit
49
Figure 3.6 Overview of an A2XD Cabinet in Simplex Configuration with Secure Power Unit
50
Figure 3.7 Overview of an A3XD Cabinet in Simplex Configuration with Secure Power Unit
51
Figure 3.8 Overview of an AXD Cabinet in Duplex Configuration
52
Figure 3.9 Overview of an A3XD Cabinet in Duplex Configuration
54
General Description of AXL Ipbxs
55
Figure 3.10 Overview of an AXL Cabinet
56
Figure 3.11 Rear View of an AXL Cabinet
57
Figure 3.12 Overview of an A2XL Cabinet
58
Figure 3.13 Overview of an A3XL Cabinet
59
General Description of AXS Ipbxs
60
Internal Description
61
Figure 3.14 Overview of an AXS Cabinet
62
Figure 3.15 Overview of an A2XS Cabinet
63
Figure 3.16 Rear View of an AXS Cabinet
64
Physical Description of an Aastra XS12 Ipbx
65
Internal Description
66
Figure 3.17 Overview of an AXS12 Cabinet
67
Figure 3.18 Rear View of an AXS12 Cabinet
68
Physical Description of an Aastra XS6 Ipbx
69
Internal Description
70
Figure 3.19 Overview of an AXS6 Cabinet
71
Figure 3.20 Rear View of an AXS6 Cabinet
72
Characteristics
73
Environmental Conditions
75
Capacity
76
3.4 Physical Breakdown
77
Physical Breakdown
77
Simplex with Secure Power
77
Duplex
78
Simplex
78
Simplex with Secure 1 1 2
78
Duplex
79
Figure 4.3
79
Simplex
79
Aastra XS/XL
82
Figure 5.3
83
AXD Ipbxs
84
Configuration Rules
84
A2XD and A3XD Expansion Cabinet
86
Ucv
87
AXL Ipbx
87
CLX Cards
88
Ld4/Ld4N (2) (3) 6 6 6 3 3 3
88
Ips (2)
89
Equipment Cards
90
La16X La16X-8
90
La8 Ln16X Ln16X-8
90
Lh16X
90
A2XL and A3XL Expansion Cabinets
90
AXS/AXS12/AXS6 Ipbx
91
I-Button Dongle and Software Locking
92
Command and Processing Unit
93
Duplex and Start Logic Function (Aastra XD Only)
94
Voice Mail Server Function
95
Connection to the Communication Networks and Terminals
96
Duplication (Aastra XD)
97
Synchronisation Chain (Plate 9.1)
100
Management of the Master/Slave Mode (Multisite Network)
101
Defence Chain
102
Monitoring
103
Self Protection
104
Aastra XS/XL
108
Figure 3.23 Block Diagram of the Power Supply Chain in an AXL Cabinet
109
Figure 3.24 Block Diagram of the Power Supply Chain in an AXS Cabinet
110
Figure 3.25 Block Diagram of the Power Supply Chain on an AXS12/AXS6 Cabinet
111
Internal Monitoring of AXS/AXL/AXD
112
Figure 3.26 Connecting a Battery Pack in Parallel to an A3XD Ipbx
113
Figure 3.27 Connecting a Battery Pack in Parallel to an A3XL Ipbx
114
Figure 3.28 Connecting a Battery Pack in Parallel to an A2XD Ipbx
115
Figure 3.29 Connecting a Battery Pack in Parallel to an A2XL Ipbx
116
Figure 3.30 Connecting a Battery Pack in Parallel to an A2XS Ipbx
117
Ventilation
118
Standard Configuration
119
The User Interface
120
Description des Sous-Ensembles
121
Figure 4.1 Procedure for Locking a Card or Blanking Plate
122
Loading CLX Cards
123
Power Supply Module
124
Monitoring
125
Hardware Configuration
126
ADS 300XD (AXD Ipbx)
127
Monitoring
128
Physical Description (Figure 4.3 )
129
Installation and Wiring
130
Figure 4.4 OVERVIEW of the ADS 350X MODULE
131
Monitoring
131
Physical Description (Figure 4.5 )
132
Hardware Configuration
133
ADS 300X (AXL Ipbx)
134
Figure 4.5 OVERVIEW of the ADS 300X MODULE
135
Monitoring
135
Physical Description (Figure 4.5 )
136
Hardware Configuration
137
ADS 150X (AXS and AXS12 Ipbxs)
138
Hardware Configuration
139
Ucv-D Card
140
AMT/PTD/PBX/0058/4/6/EN Installation and Maintenance Manual - Aastra
142
Figure 4.6 OVERVIEW of the UCV-DCARD
142
Physical Description
143
Indicators
145
Hardware and Software Configuration
146
Figure 4.7 IUCV-D Interface between Two UCV-D Cards
148
Iucv-D Card
148
Figure 4.8 OVERVIEW of the IUCV-DCARD
150
Physical Description
151
Connectors
152
Figure 4.10 Presentation of IUCV-D Card Indicators
155
Hardware and Software Configuration
156
Rucv-D Card
157
Figure 4.11 OVERVIEW of the RUCV-DCARD
158
Figure 4.12 Colour Code for Connection to the Expansion Cabinet(S)
159
Hardware and Software Configuration
159
Figure 4.13 Connecting an Expansion Cabinet
160
Figure 4.14 Connecting an Expansion Cabinet
160
Connecting Two Expansion Cabinets (A3XD)
161
Figure 4.15 Connecting an Expansion Cabinet (Duplex Configuration)
161
Figure 4.16 Connecting Two Expansion Cabinets (Simplex Configuration, UCV-D(A)/RUCV-D(A))161 Figure 4.17 Connecting Two Expansion Cabinets (Simplex Configuration, UCT-D(B)-RUCT-D(B))162 Figure 4.18 Connecting Two Expansion Cabinets (Duplex Configuration)
163
Ucv-L Card
164
Figure 4.19 Overview of the UCV-L Card
166
Physical Description
167
Figure 4.20 UCV CARD RELAY CONTACTS
171
Indicators
172
Figure 4.21 PRESENTATION of UCV-LCARD INDICATORS
173
Hardware and Software Configuration
173
Installation and Wiring
174
Ucv-S Cards
175
Figure 4.22 Overview of the Ucv-S Card
176
Physical Description
177
Indicators
180
Figure 4.23 Presentation of UCV-S Card Indicators
181
Hardware and Software Configuration
183
Ext1-S Card
184
Figure 4.24 OVERVIEW of the EXT1-SCARD
185
Physical Description
186
Figure 4.25 Configuring Remote Power Supply of S/T0 to S/T3 Accesses
187
Indicators
187
Figure 4.26 Connecting a DECT Base Station to an S0 Interface of the EXT1-S Card
188
Installation and Wiring
188
Hardware and Software Configuration
190
Ext1-S12 Card
191
AMT/PTD/PBX/0058/4/6/EN Installation and Maintenance Manual - Aastra
192
Figure 4.27 Overview of the EXT1-S12 Card
192
Physical Description
193
Figure 4.28 Configuring Remote Power Supply of S/T0 to S/T3 Accesses
194
Hardware and Software Configuration
194
Figure 4.2
196
Figure 4.29 Connecting a DECT Base Station to an S0 Interface of the EXT1-S12 Card
196
Figure 4.30 Overview of the EXT1-S6 Card
197
Physical Description
198
Figure 4.31 Configuring Remote Power Supply of S/T0 to S/T3 Accesses
199
Hardware and Software Configuration
199
Figure 4.32 Connecting a DECT Base Station to an S0 Interface of the EXT1-S6 Card
201
Rucv-L Card
202
Indicators
203
Installation and Wiring
204
Figure 4.33 OVERVIEW of the RUCV-LCARD
205
Rucv-S Card
206
Hardware and Software Configuration
207
Figure 4.34 OVERVIEW of the RUCV-SCARD
208
Application Cards (Clx)
209
Figure 4.35 Overview of the LD4 Card
210
Physical Description
210
Hardware Configuration
212
Figure 4.36 Wiring the T0 Interface of an LD4 Card
213
Installation and Wiring
213
Figure 4.37 Wiring an S0 Bus
214
Figure 4.38 Connecting a DECT Base Station to an LD4 Card
215
Description of the Signal Processing Daughter Card
216
LD4NX Card
217
Figure 4.39 Overview of the LD4NX Card
219
Figure 4.9
220
Physical Description
220
Hardware Configuration
223
Installation and Wiring
224
Figure 4.40 Wiring the T0 Interface of an LD4NX Card
225
Figure 4.41 Wiring an S0 Bus
226
Figure 4.42 Connecting a DECT Base Station to an LD4NX Card
227
LT2 Card
228
Figure 4.43 Overview of the LT2 Card
229
Physical Description (See Figure 4.37 )
230
Hardware Configuration
232
Figure 3.1
233
Figure 3.3
235
Figure 3.2
236
Installation and Wiring
237
PT2 Card
238
Figure 4.44 Overview of the PT2 Card
239
Physical Description (See Figure 4.44 )
240
Hardware Configuration
241
Figure 4.45 Wiring a Pt2 Card
242
Installation and Wiring
242
CS1 Card
243
Figure 4.46 How to Use a CS1 or CA1 Card Built into an Ipbx
243
Figure 4.47 Overview of the CS1 Card
244
Physical Description
245
Hardware Configuration
246
Installation and Wiring
247
Figure 4.48 Overview of the CA1 Card
249
Physical Description (See Figure 4.48 )
250
Hardware Configuration
252
Figure 4.49 Overview of the Cp1 Card
254
Physical Description (See Figure 4.49 )
255
MUM Card
256
Figure 4.50 Overview of the Mum Card
257
Physical Description (See Figure 4.50 )
258
Hardware Configuration
259
Figure 4.51 Overview of the LA16X Card
261
Physical Description (See Figure 4.51 )
262
Figure 4.52 Wiring an Lax or Lmx Card
263
Figure 4.53 Overview of the LA16X-8 Card
264
Physical Description (See Figure 4.53 )
265
Figure 4.54 Overview of the LA8 Card
266
Physical Description (See Figure 4.54 )
267
Figure 4.55 Overview of the LN16X Card
268
Physical Description (See Figure 4.55 )
269
Figure 4.56 Overview of the LN16X-8 Card
271
Physical Description (See Figure 4.56 )
272
LN8 Card
274
Figure 4.57 Overview of the LN8 Card
275
Hardware Configuration
275
Figure 4.58 Overview of the LM8 Card
276
Physical Description (See Figure 4.58 )
277
LH8 Card
278
Figure 4.59 Overview of the LH8 Card
279
Figure 4.60 Overview of the LH16X Card
280
Hardware Configuration
281
Figure 4.61 Overview of the LH16X-8 Card
282
Hardware Configuration
283
LR4 Card
284
Figure 4.62 Overview of the LR4 Card
285
Physical Description (See Figure 4.62 )
286
Hardware Configuration
287
Installation and Wiring
288
LI1 Card
289
Figure 4.63 Overview of the LI1 Card
291
Physical Description (See Figure 4.63 )
292
Hardware Configuration
293
Figure 4.64 Li1 Cable
294
Installation and Wiring
294
Figure 4.65 Wiring a 50 Hz 2-Wire Analogue TL
296
Figure 4.66 Wiring a 2-Wire+E&M Analogue TL
296
Figure 4.67 Wiring a 4-Wire+E&M Analogue TL
297
Figure 4.68 Wiring a 4-Wire+E&M Analogue TL
297
Figure 4.69 Overview of the BTX Card
298
Physical Description (See Figure 4.50 )
299
Presentation of Peripheral Devices
301
Analogue Sets
302
Description
303
Computer Terminals
304
Attendant Consoles (Atdc)
305
Figure 5.1 EXTERNAL MUSIC / UCV Wiring
306
Miscellaneous Equipment
306
Figure 5.2 Connecting a Common Bell (IUCV-D Card)
307
Installation
307
Figure 5.4
308
Figure 5.5
308
Installation
308
Installation and Activation
309
Preliminary Operations
310
Environment
311
Earth Connection
312
Installing an AXD Cabinet
314
Installing a Cabinet (AXL, AXS, AXS12 and AXS6)
317
Wiring (AXD, AXL, AXS, AXS12 and AXS6)
319
Powering on the System
320
Accessing Aastra Management Portal (User Interface)
327
AMT/PTD/PBX/0058/4/6/EN Installation and Maintenance Manual - Aastra
328
The COM Port (PPP Protocol)
329
Backup Remote Access to AMP in SSH Mode
337
Modifying the Factory Settings
339
Resetting the Manufacturer's Password (in Case of Loss)
348
Massive Import from the Massive Creation Form
350
Operations on a Site Already Installed
351
Handling Cards
352
Adding a CLX Card (AXD, AXL, AXS, AXS12 and AXS6)
353
Adding an Equipment Card (AXD, AXL, AXS, AXS12 and AXS6)
355
Adding EIP Cards to an UCV CPU Card
357
Figure 6.1 CPU Card Fitted with an EIP Card
357
Figure 6.2 CPU Card Fitted with Two EIP Cards
358
Adding EIP Cards for AXD Configuration
359
Adding EIP Card(S) for AXL, AXS, AXS12 and AXS6 Configuration
361
Adding an Expansion Cabinet
362
Adding an Expansion Cabinet (AXL)
363
Adding an AXD Power Module
365
Changing to DUPLEX Configuration for AXD
367
Stopping the System (Axd, Axl, Axs, Axs12 and Axs6)
369
Viewing the Ip Address in Case of Loss (Offline)
370
Updating the Software of a Simplex Aastra System R5.1 to R5.2
371
Loading Update Files
372
Switchover
376
Upgrading the Software of a Simplex Aastra System R5.2
378
Restarting and Validating the New Version
379
Upgrading the Software from Aastra Management am 7450
380
Upgrading an Axd in Duplex Configuration Mode
381
Accessing the User Interface Via an Analogue Modem
382
Accessing the User Interface (Amp) Via an Isdn Modem
385
Accessing the User Interface (Amp) Via an Isdn Router
388
Card
389
Migration Process
390
Replacing the Compact Flash Card
392
Restoring Data from the USB Key
393
Maintenance
395
Maintenance Resources
396
Preventive Maintenance
397
Restarting
398
Interchangeable AXD Ipbx Subassemblies
399
Interchangeable AXS/AXL Ipbx Subassemblies
401
Interchangeable AXD/AXL/AXS/AXS12/AXS6 Ipbx Cables
402
Interchangeable Fuses
403
Interchangeable Cabinets (Axd Ipbx with Ads350Xd)
404
Mounting Kits
404
Alarm Messages and Codes
405
Corrective Maintenance
406
Figure 7.1 Overview of an Exchange Sheet (E Sheet)
407
Conventions Used in the Sheets
408
List of E Sheets
409
AMT/PTD/PBX/0058/4/6/EN Installation and Maintenance Manual - Aastra
450
Mum 10 10 10 3 3 3
90
Installing and Using the Ips Card
451
Functional Diagrams
453
Installing A5000 Server (Non-Redundant)
459
Important Pre-Requisite
459
Installing the A5000 Server Application
459
Accessing the (Amp) User Interface
470
Declaring the Licences for Virtual A5000 Server
472
Resetting the Manufacturer's Password (in Case of Loss)
473
Massive Import from the Massive Creation Form
475
Additional Configurations
476
Upgrading Aastra 5000 Server Software R5.1 to R5.2
477
Checking the Release of Red hat Enterprise
478
Upgrading Aastra 5000 Server R5.2 Software
479
Loading the Application
481
Switchover
484
Restarting and Validating the New Version
485
Via Aastra Management am 7450
486
Appendices
487
Activating/Deactivating Selinux in Red hat 5
492
Configuring the Firewall for Acs
493
AMT/PTD/PBX/0058/4/6/EN Installation and Maintenance Manual - Aastra
494
Using the Massive Creation Form
496
Structure and Content of the Excel Form
497
Backing up the File in .Csv Format
499
External Record Creation Tab
500
Selection Keys Tab
501
Multi-Lines Tab
502
Advertisement
Advertisement
Related Products
Aastra AXL
Aastra AXS
Aastra AXS12
Aastra AXD
Aastra Ascotel Voice Mail System AVS 5150
Aastra ATP-CNX-040-01
Aastra IntelliGate A150
Aastra IntelliGate A300
Aastra A340w
Aastra A342w
Aastra Categories
IP Phone
Telephone
Cordless Telephone
Conference System
Telephone System
More Aastra Manuals
Login
Sign In
OR
Sign in with Facebook
Sign in with Google
Upload manual
Upload from disk
Upload from URL