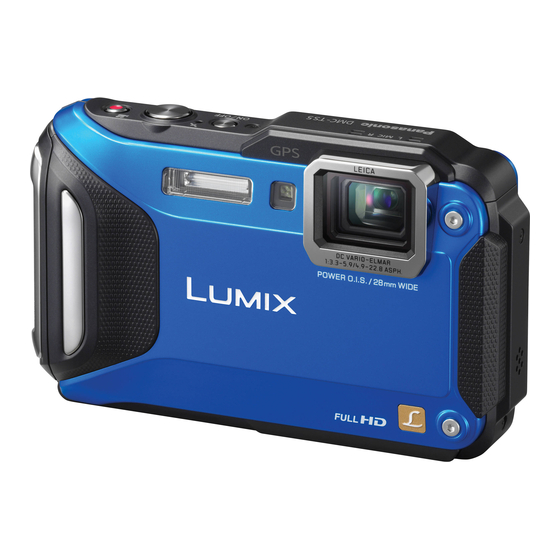
Panasonic DMC-TS5 Connection Manual
Wi-fi connection guide
Hide thumbs
Also See for DMC-TS5:
- Basic owner's manual (43 pages) ,
- Owner's manual (277 pages) ,
- Basic operating instructions manual (36 pages)
Advertisement
Quick Links
Digital Camera
Model No. DMC-TS5
Wi-Fi
®
Connection Guide
Let's connect to the Wi-Fi
®
You can connect Wi-Fi
compatible devices to the camera wirelessly.
You can connect them directly or via a wireless access point.
When connecting the camera to a
smartphone/tablet directly
Connecting the camera to a smartphone/tablet
1
Installing the smartphone/tablet app "Image App"
Operation on the smartphone/tablet
1
Connect the smartphone/tablet to a network.
2
Android
TM
Select "Google Play
TM
Store".
iOS
Select "App Store
SM
".
3
Enter "Image App" into the search box.
4
Select "Image App"
and install it.
Supported OS
For Android apps: Android 2.2 ~ Android 4.2
For iOS apps: iOS 4.3 ~ iOS 6.0
Android and Google Play are trademarks or registered trademarks of Google Inc.
App Store is a service mark of Apple Inc.
"Wi-Fi" and "Wi-Fi Protected Setup" are marks or registered marks of the Wi-Fi Alliance.
DLNA, the DLNA Logo and DLNA CERTIFIED are trademarks, service marks, or certifi cation marks of the Digital Living Network
Alliance.
The camera is not capable of connecting to a wireless network via public
wireless LAN.
VQC9362
When connecting the camera to a TV or
PC, etc. via a wireless access point
SEE REVERSE SIDE
You can record/playback by
using the smartphone/tablet.
You can also save pictures
in the camera on the
smartphone/tablet.
The service may not be able to be used properly depending on the
type of smartphone/tablet being used. For compatible devices, see
the following support site.
http://panasonic.jp/support/global/cs/dsc/
(This Site is English only.)
When downloading the app on a mobile network, high packet communication
fees may be incurred depending on the details of your contract.
2
Connecting the camera to the smartphone/tablet (Remote Shooting)
Connect by using the NFC function
This function can be used with the NFC compatible device with Android (OS version 2.3.3 or later). (excluding some models)
1
2
Image App
Image App
Launch "Image App" on
Touch the smartphone/tablet
to [ ] of the camera.
the smartphone/tablet.
Connecting manually
Operation on the camera
1
2
Press camera [ON/OFF] button.
Select [New Connection].
Press [Wi-Fi].
Make sure the Wi-Fi connection
You can select the setting
lamp
is lit blue.
you used before from [History
Lit blue:
Connection].
The Wi-Fi connection is on standby
Please refer to "Owner's Manual
Blinking blue:
for advanced features" (PDF) for
Sending/receiving data through the
details.
Wi-Fi connection
Operation on the smartphone/tablet
4
5
On the setting menu
Select the same SSID as
of your smartphone/
the one displayed on the
screen in step 3.
tablet, turn on the Wi-Fi
function.
Read the [Help] in the "Image App" menu for further details on how to operate.
[When connecting for the fi rst time]
When the connection screen is displayed, select [Yes], and touch [
the smartphone/tablet again.
If the camera is not
recognized even when
touching the smartphone/
tablet, change positions
and try again.
Do not touch this camera
to the smartphone/tablet
strongly.
For information on the
operation and settings
1
of NFC-compatible
If you perform steps
and
smartphones/tablets, refer
performing single image playback on
to the operating instructions
of your device.
the camera, you can easily transfer
the image to the smartphone/tablet.
3
Select [Remote Shooting].
The SSID and password
are displayed.
To change the connection method, press [DISP.].
(Such as [WPS Connection], [Via Network], etc.)
Please refer to "Owner's Manual for advanced features" (PDF) for details.
SSID refers to the name that is used to identify a network over a wireless LAN
connection. If the SSID matches for both devices, transmission is possible.
WPS (Wi-Fi Protected Setup
TM
) refers to a function that allows you to easily confi gure
the settings related to the connection and security of wireless LAN devices.
( The following is an example of when Android is being used.
Screens vary depending on your OS.)
6
7
Image App
Enter the password
Start "Image App" on
displayed on the screen
your smartphone/tablet.
in step 3, and connect.
When the connection is
established, the recording
screen is displayed.
] on
2
while
Advertisement

Summary of Contents for Panasonic DMC-TS5
- Page 1 Digital Camera Connecting the camera to the smartphone/tablet (Remote Shooting) Model No. DMC-TS5 The camera is not capable of connecting to a wireless network via public wireless LAN. VQC9362 Wi-Fi ® Connection Guide Connect by using the NFC function This function can be used with the NFC compatible device with Android (OS version 2.3.3 or later). (excluding some models) Let’s connect to the Wi-Fi...
-
Page 2: Operate The Camera
One of the connection methods is shown as an example. Connecting the camera to a TV or PC etc. via a wireless access point Please refer to “Owner’s Manual for advanced features” (PDF) for details. Operation on the camera Turn on the Select [New Select the desired option.


