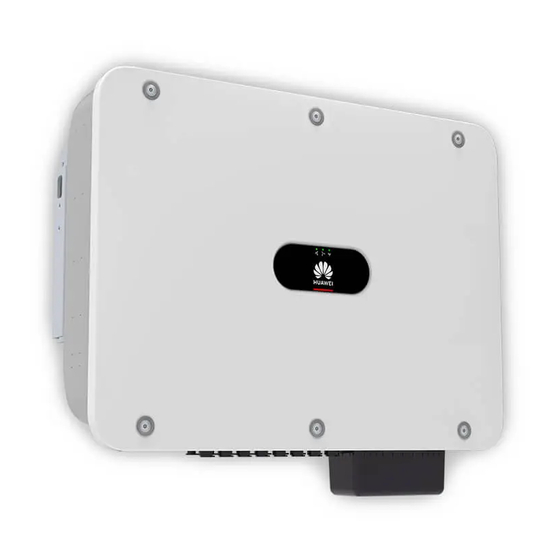
Summary of Contents for Huawei SUN2000-50KTL-NHM3
- Page 1 SUN2000-50KTL-NHM3 Quick Guide Issue: 02 Part Number: 31500HQX Date: 2023-01-10 HUAWEI TECHNOLOGIES CO., LTD.
- Page 2 • Before installing the device, read the user manual carefully to get familiar with product information and safety precautions. Huawei shall not be liable for any consequences caused by the violation of the storage, transportation, installation, and operation regulations specified in this document and the user manual.
-
Page 3: Installation Requirements
Installation Requirements If inverters are installed in a place with abundant vegetation, in addition to routine weeding, harden the ground underneath the inverters using cement or gravel (recommended area: 3 m x 2.5 m). Angle Space Dimensions Installing a Solar Inverter •... - Page 4 Moving the Solar Inverter 1. Install the mounting bracket. It is recommended that anti-rust measures be taken on the positions for drilling holes. 2. Install the solar inverter onto the 3. Tighten the security Torx screws on both mounting bracket. sides.
-
Page 5: Connecting Cables
Do not connect loads between the inverter and the AC switch that directly connects to the inverter. Otherwise, the switch may trip by mistake. If an AC switch is used with specifications beyond local standards, regulations, or Huawei's • recommendations, the switch may fail to turn off in a timely manner in case of exceptions, causing serious faults. -
Page 6: Installing The Ac Output Power Cable
Connecting a PE Cable Reserved PE point Do not connect the neutral wire to the enclosure as a PE cable. Otherwise, electric shocks may occur. • The PE point at the AC output port is used only as a PE equipotential point, not a substitute for the PE point on the enclosure. - Page 7 2. Connect the AC output power cable (using a four-core cable as an example).
-
Page 8: Installing Dc Input Power Cables
Installing DC Input Power Cables When the DC input is not fully configured, the DC input terminals must meet the following requirements: • Evenly distribute DC input power cables to the four MPPTs. MPPT 1 and MPPT 4 are preferred. Maximize the number of connected MPPTs. - Page 9 1. Connect the DC power cables. Positive connector Positive metal terminal Negative Click Ensure that the cable connector cannot be pulled out Negative metal terminal after being crimped. Use the wrench shown in the figure to tighten Ensure that the the locking nut.
-
Page 10: Installing The Signal Cable
When reinstalling the cover of the Smart Dongle, ensure that the buckle springs back in place. Smart Dongle port Quick Guide Installing the Signal Cable • When laying out the signal cable, separate it from the power cable and keep it away from strong interference sources to avoid strong communication interference. - Page 11 COM Port Pin Definitions Definiti Definitio Function Description Function Description RS485 RS485 485A1- differential 485A1-2 differential Used to cascade Used to cascade signal + signal + inverters or inverters or connect to the connect to the RS485 RS485 SmartLogger. SmartLogger. 485B1-1 differential 485B1-2...
- Page 12 Scenarios Where No Signal Cable Is Connected If no signal cable is required for the SUN2000, use waterproof plugs to block the wiring holes on the signal cable connector and connect the signal cable connector to the communications port on the SUN2000 to improve the waterproof performance of the SUN2000. (Optional) Connecting the Signal Cable 1.
- Page 13 • Connect the RS485 communications cable to the solar inverter. If two or more solar inverters are cascaded, install the RS485 communications cable. 2. Connect the signal cable connector to the communications port. Communications port (COM)
-
Page 14: Verifying The Installation
Verifying the Installation Acceptance Criteria The solar inverter is installed correctly and securely. The cables are routed properly as required by the customer. The communications expansion module is installed correctly and securely. Cable ties are evenly distributed and no burr exists. The PE cable is connected correctly and securely. - Page 15 Install the FusionSolar app (5.7.001 or later). • The screenshots in this document correspond to app version should be 5.7.001. Downloading the App Method 1: Access https://solar.huawei.com using the mobile phone browser and download • the latest installation package. •...
- Page 16 Creating a PV Plant and a User For details about how to use the site deployment wizard, see FusionSolar App Quick Guide. Device Commissioning 1. Access Device commissioning. Scenario 1: Your phone is not Scenario 2: Your phone is connected to the Internet. connected to the Internet.
- Page 17 2. Connect to the solar inverter WLAN and log in as installer to access the device commissioning screen. SUN2000-XXKTL-XX System Commissioning (SmartLogger Web) 1. The operating system of Windows 7 or later is supported. 2. The WebUI snapshots are for reference only, and the actual display prevails. Preparations and WebUI Login 1.
- Page 18 3. Set LAN parameters. If the SmartLogger is connected to a • local area network (LAN) and a proxy server has been set, you need to cancel the proxy server settings. • If the SmartLogger is connected to the Internet and the PC is connected to the LAN, do not cancel the proxy server settings.
- Page 19 3. Click Deployment Wizard and set parameters as prompted. Click Skip for unused devices. FAQ: How Do I Reset the Password? 1. Check that the AC and DC power supplies to the solar inverter are connected simultaneously, and that the indicators are steady green or blink slowly for more than 3 minutes.
- Page 20 Huawei Technologies Co., Ltd. Huawei Industrial Base, Bantian, Longgang Shenzhen 518129 People's Republic of China solar.huawei.com...


