Advertisement
Quick Links
Replacing FRUs in a Spare CGR Chassis
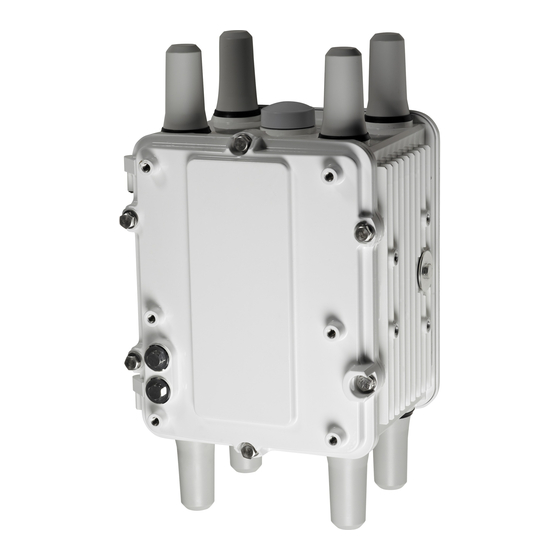
This document describes how to replace the Field Replaceable Units (FRUs) in a chassis on the CGR1240 with a new
one in the event of a Return Material Authorization (RMA).
Before You Begin
You must have the following tools available before starting the procedure.
1/2-inch (13-mm) socket wrench to open and close the router chassis door
A Spudger pry tool, see
https://www.ifixit.com/Store/Tools/Spudger/IF145-002-2
A torque driver capable of exerting 72-84 lbs-in, see
Side cut pliers or an equivalent tool for cutting cable ties.
A #1 Phillips head screwdriver
A Strap Wrench, see
Figure 1
Figure 3
Cisco Systems, Inc.
Figure 2
www.cisco.com
1
Advertisement

Summary of Contents for Cisco CGR1240
- Page 1 Replacing FRUs in a Spare CGR Chassis This document describes how to replace the Field Replaceable Units (FRUs) in a chassis on the CGR1240 with a new one in the event of a Return Material Authorization (RMA). Before You Begin You must have the following tools available before starting the procedure.
-
Page 2: High Level Description
Replacing FRUs in a Spare CGR Chassis High Level Description Figure 1 Spudger pry tool Figure 2 TBN Torque Wrench Figure 3 Strap Wrench High Level Description These steps are explained in greater detail later on in this document. Open the spare chassis. Open the console port and SD card slot. Do not power on router yet. Power down the old chassis to be replaced. - Page 3 Replacing FRUs in a Spare CGR Chassis Detailed Steps to Replace the Chassis The new SD Card will come with images preloaded, but not with customer configurations. All configurations need to be pre-configured based on the customer configuration to join the Field Network Director. Detailed Steps to Replace the Chassis Follow these steps to replace the chassis and return the router to use.
- Page 4 Replacing FRUs in a Spare CGR Chassis Detailed Steps to Replace the Chassis Figure 4 Captive Bolt Detail Figure 5 Recommended Order of Loosening Bolts Step 2. Power down the router. Disconnect the router from its power source.
- Page 5 Detailed Steps to Replace the Chassis Step 3. Replacing the Modules, N-Connectors, & Antennas. Cisco recommends you to remove and insert modules to corresponding slots from the old chassis to the new chassis in the following order: Slot 3 module...
- Page 6 Replacing FRUs in a Spare CGR Chassis Detailed Steps to Replace the Chassis Figure 6 Router Faced Down Figure 7 Router Faced Top Front of Router (Door) Removing and Replacing each module. The steps for removing the module in the slots (1 by 1) of the old chassis and inserting into the new chassis are as follows: Unplug the RF cable(s) from the antenna or N-connector with the spudger.
- Page 7 Replacing FRUs in a Spare CGR Chassis Detailed Steps to Replace the Chassis Remove the corresponding antenna or N-connector from the old chassis. The antennas can be removed with a strap wrench or bare hands. The N-connector cap Figure 8 can be removed with bare hands.
- Page 8 Zip Tie Locations on Share Chassis Step 4. Swapping Battery Back Up (BBUs) from Old to New Chassis Before swapping the BBUs in the CGR 1240, Cisco recommends the following: Best practice is to replace all of the BBUs.
- Page 9 Replacing FRUs in a Spare CGR Chassis Detailed Steps to Replace the Chassis Warning: Only trained and qualified personnel should be allowed to install, replace, or service this equipment. To prevent ESD damage, follow these guidelines: Always use an ESD wrist or ankle strap and ensure that it makes good skin contact ...
- Page 10 Replacing FRUs in a Spare CGR Chassis Detailed Steps to Replace the Chassis Figure 11 Battery Backup Units Mounted on Router Door Figure 12 Sequence of Tightening and Loosening BBU Screws Figure 13 Battery Cable Connection to BBU Connector...
- Page 11 Discard the SD card that you were previously using. The new SD card ships in the spare chassis For additional detail about SD Card replacement, see the related section in the CGR 1240 Hardware Installation Guide: https://www.cisco.com/c/en/us/td/docs/routers/connectedgrid/cgr1000/hardware/cgr1240/installation/sd.html Step 6. Final Checks Ensure that all RF cables are tied down per instructions and that no RF cables are on the cover faying surface or draped across BBU cavity.
- Page 12 Replacing FRUs in a Spare CGR Chassis Detailed Steps to Replace the Chassis Figure 14 Recommended Order of Tightening Bolts...


