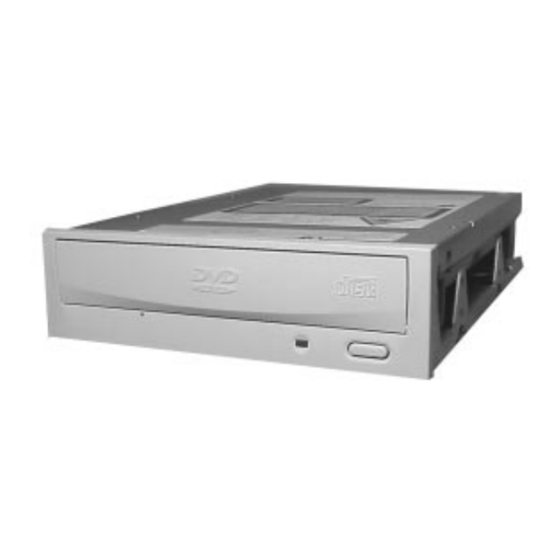
Summary of Contents for Toshiba 1202kit
- Page 1 TOSHIBA Storage Device Division DVD-RAM DRIVE SD-W2002 Installation Instructions with VOB InstantWrite CyberLink PowerDVD Software VERSION 3.0 JANUARY 2002...
- Page 2 Unless otherwise stated in writing, non-Toshiba software is provided on an “as is” basis by Toshiba. Any service or repair for items not covered by this limited warranty shall be at Toshiba’s or its Authorized Service Partner’s rates and terms then in effect.
- Page 3 IF YOUR DATA IS ALTERED OR LOST DUE TO ANY TROUBLE, FAILURE OR MALFUNCTION OF THE HARD DISK DRIVE OR OTHER STORAGE DEVICES AND THE DATA CANNOT BE RECOVERED, TOSHIBA SHALL NOT BE LIABLE FOR ANY DAMAGE OR LOSS OF DATA, OR ANY OTHER DAMAGE RESULTING THEREFROM. WHEN COPYING OR TRANSFERRING YOUR DATA, PLEASE BE SURE TO CONFIRM WHETHER THE DATA HAS BEEN SUCCESSFULLY COPIED OR TRANSFERRED.
-
Page 4: Table Of Contents
Table of Contents Kit Packaging ... 1 System Requirements ... 1 Setting Jumpers ... 2 Connecting Cables ... 3 Completing Installation ... 5 DVD-RAM Front Panel ... 6 DVD-RAM Rear Panel ... 6 Operating the DVD Loading Tray ... 7 Specifications ... -
Page 5: Kit Packaging
Congratulations on your purchase of a Toshiba DVD-RAM drive and Kit. The following information will help you in the simple installation of your new DVD- RAM drive. CHECKING YOUR KIT PACKAGING Please unpack your DVD-RAM kit, and assure that you have the following items:... -
Page 6: Setting Jumpers
The following steps must be performed to properly install your DVD-RAM. Set drive’s jumpers Connect audio cable Attach IDE BUS cable Connect power cable Mount DVD-RAM Install CyberLink PowerDVD Install VOB InstantWritesoftware (used for recording CDs) SETTING JUMPERS The mode select jumpers are six (6) straight angle pins located on the rear of the DVD-RAM. -
Page 7: Connecting Cables
2. If the DVD-RAM is replacing a CD-ROM, disconnect all connectors and re- move the CD-ROM presently installed in your system. 3. Your Toshiba DVD-RAM can be placed in any free half-height drive slot at the front of your computer. (It can be mounted horizontally or vertically.) 4. - Page 8 cable (side with red stripe) is connected to pin 1 on the drive. • If the DVD-RAM is the only drive connected on the secondary IDE BUS cable: connect drive to the last set of pins on IDE BUS cable. •...
-
Page 9: Completing Installation
ATAPI CD/DVD Software Driver: Toshiba’s DVD-RAM drives do not require any unique device drivers for Win- dows '95/'98/2000/NT. After installing your drive and re-booting, your system should recognize your drive. Win '95/'98/2000/NT operating systems support all Toshiba ATAPI CD-RW, CD-ROM, DVD-ROM and DVD-RAM drives natively. -
Page 10: Dvd-Ram Front Panel
DVD-RAM FRONT PANEL The photo below illustrates the following features of the SD-W2002 DVD-RAM’s front panel: Emergency Eject Hole: The emergency eject hole is to be used only when the DVD tray will not open when the Load/Unload button is pressed. Insert solid bar (i.e. paper clip) into hole, applying gentle presure, until tray opens. -
Page 11: Operating The Dvd Loading Tray
OPERATING THE DVD LOADING TRAY To open the DVD loading tray, just press the Load/Unload button. After inserting or removing a disc or recording cartridge, press the Load/Unload button again. You must use a DVD-RAM recording cartridge when recording DVD-RAM media. Vertical Disc Installations When placing a disc into a DVD-RAM drive that has been mounted vertically, be assured that the disc in installed under the two front tabs. -
Page 12: Specifications
REPAIR CENTER Should your DVD-RAM require maintenance, contact Toshiba SDD’s Repair Cen- ter. In order to return your DVD-RAM, a Return Authorization Number (RA#) must be obtained from the Repair Center (do not send drive without an authorized RA number. - Page 14 460020-C0 P/N 460020-C0...


