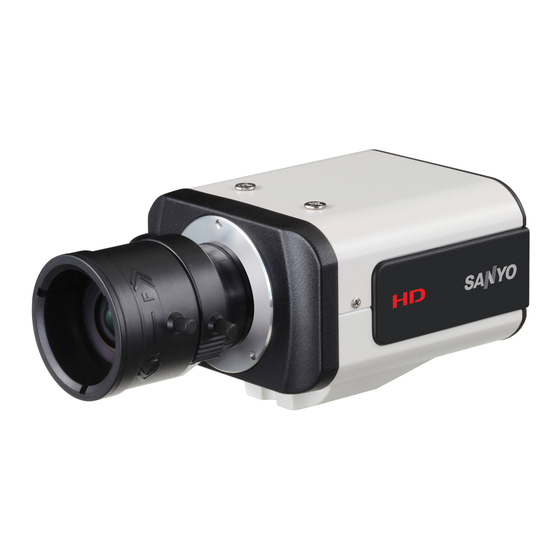
Sanyo VCC-HD2300 Instruction Manual
Hide thumbs
Also See for VCC-HD2300:
- Specifications (7 pages) ,
- Manual (118 pages) ,
- User manual (118 pages)
Summary of Contents for Sanyo VCC-HD2300
- Page 1 VCC-HD2300/HD2300P VCC-HD2100/HD2100P Features of This Camera Specifications Name and Function of Each Component Connections Lens Installation Lens Adjustment Viewing Firmware Version Introduction1/17...
- Page 2 The camera supports network operation. By simply connecting a LAN cable to it, you can construct the most advanced network monitoring system. From the Web browser (Internet Explorer) installed on your PC, you can operate the camera via the network in an easy-to-use manner. In addition, it is a PoE product that can be powered through a LAN cable, so you can install it in locations where there is no power outlet nearby.
- Page 3 Auto (32× max) or Off boosting Electronic shutter VCC-HD2300P/VCC-HD2100P: 1/25, 1/50, 1/120, 1/250, 1/500, 1/1000, 1/2000, 1/4000, 1/10000 VCC-HD2300/VCC-2100: 1/30, 1/60, 1/100, 1/250, 1/500, 1/1000, 1/2000, 1/4000, 1/10000 Long exposure shutter (1×, 2×, 4×, 8×, 16×, 32×) Electronic iris ON/OFF (Set [SHUTTER] to “EI”.)
- Page 4 Image/video H.264/JPEG compression Video size (H.264) (16:9) 1920×1080, 1280×720, 640×360, 320×180 (4:3) 1600×1200, 1280×960, 1024×768, 640×480, 320×240 Video size (JPEG) (16:9)1920×1080, 1280×720, 1024×576, 640×360 (4:3) 2288×1712, 1600×1200, 1280×960, 1024×768, 800×600, 640×480, 320×240 Picture quality QUALITY mode: BASIC, NORMAL, ENHANCED, FINE, SUPER FINE BITRATE mode: User-specified bit rate Interface 10BASE-T/100BASE-TX...
- Page 5 This indicator lights up when the camera is powered on. The indicator blinks while the firmware is being updated. Use these terminals to connect a 24 VAC or 12 VDC power supply. The power indicator lights up when the camera is powered on.
- Page 6 When used as Day/Night switching terminal, you can switch between color and black-and-white video modes using an external control signal. (This function is supported only by VCC-HD2300P/VCC-HD2300) Using network operation, under [DAY/NIGHT], set [DAY/NIGHT] to “COLOR” and select the terminal you want to use in [EXT ALARM].
- Page 7 Operation Associated button and use Equivalent network operation screen Restarting camera Press the RESET button. OPTION SETTINGS (CAMERA REBOOT) Restoring factory default Press the NEAR and SET buttons OPTION SETTINGS (FACTORY settings simultaneously. DEFAULT) Restoring factory default Press the NEAR and FAR buttons CAMERA SETTINGS (FOCUS back focus position simultaneously.
- Page 8 Perform the following connections according to the installation environment and application of your camera. Basic Connections Alarm Input/Output Terminal Connections Before attempting the following connections, be sure to turn off all components of your system. Improper connection may cause smoke or failures. Before attempting to connect each system component, carefully read the instruction manual that comes with it to familiarize yourself with the correct connection procedure.
- Page 9 Use a LAN cable no longer than 100 m (109.4 yards) with the shield type CAT5 or higher. The supported Web browser is Internet Explorer Ver.6.0 SP2 or higher, or Internet Explorer Ver.7.0. About the internet connection Port forwarding for the video port must be enabled on the broadband router. For details on how to set port forwarding, please refer to your router's Instruction manual.
- Page 10 To perform focus adjustment with the camera, connect the supplied cable to the MONITOR OUT socket of the camera, and connect a monitor to the camera using a video cable. After adjustment, be sure to remove the monitor cable. To connect a cable, while pushing the protrusion of the terminal, insert the cable into the opening and then release Introduction 10/17...
- Page 11 (ALARM IN1 or 2) via network operation on the ALARM SETTINGS screen. To use the alarm input terminals as Day/Night switching terminals, follow the steps below. (This function is supported only by VCC-HD2300P/VCC-HD2300) Under [DAY/NIGHT], set [DAY/NIGHT] to “COLOR” and select the terminal you want to use in [EXT ALARM].
- Page 12 Connect the lens cable plug to the auto iris lens socket provided on the left-side face of the camera. It is recommended that you use a CS-mount DC auto iris megapixel lens (optional). Keep the lens clean at all times. The conversion ring (optional) is required to use a C-mount lens.
- Page 13 You may also configure the back focus position switching mode to automatically adjust the back focus position when switching between the color and black-and-white video modes. (This function is supported only by VCC-HD2300P/VCC-HD2300) Use the focus assist function to accurately focus on subject in high-resolution megapixel image because otherwise doing so would be extremely difficult.
- Page 14 PEAK HOLD: Shows the value of the maximum focus level. INDICATOR: Shows the value of the current focus level. Fine-adjusting focus (using buttons provided on side face) Use the zoom lever of the lens to adjust the angle of view and the focus lever of the lens to roughly focus on the subject.
- Page 15 If video is out of focus in either color or black-and-white mode, perform the following steps to adjust the focus. Confirm that [COLOR/B/W] is set to “AUTO” under [FOCUS ASSIST] on the CAMERA SETTINGS screen. Adjust the focus in color and black-and-white mode, respectively. If you are using an optical zoom lens and zooming operation causes the camera to lose focus, adjust the flange back distance as follows.
- Page 16 Press the SET button for 2 seconds or more. The focus adjustment screen will close. The focus adjustment screen will also close automatically if left idle for 5 minutes or more. If the camera produces too dark, too bright, or other incorrect video images, adjust the lens iris. Press the SET button for 2 seconds or more.
- Page 17 On the FIRMWARE VERSION screen, you can check the firmware version, IP address, and other information on the camera. The firmware version can also be checked via network operation on the OPTION SETTINGS screen. Press the SET button for 2 seconds or more. The monitor now shows the SELECT MENU screen.


